Friday, January 26, 2018
Computer Lab Displays 2018
Hello, internet denizens!
This is just a quick write-up of the new displays in the IT Lab for 2018. I wanted to get this posted before the start of the year has passed me by, as I've had a great reception from staff and students on how the lab looks.
On the door:
This new poster is on the lab door. It helps new parents and students figure out what my lab is: the glass on the door is darkened so it's not easy to peer in and figure it out. I've since added a timetable for the lab as the venue is nearly fully booked already.
Awesome Algorithms, Brilliant BeeBots:
This display features the great free BeeBot instruction cards from TES. I printed the BlueBot over 4 A3s, I've never printed anything at such a scale but it turned out great. The directions also have helped as a reference for students when we work with the BeeBots.
For the first time ever, we are running an experimental extra-mural technology option for Gr 2 and Gr 3. This term we are working exclusively with BeeBots in our new Tech Club time so this board has been referred to often. My students like to use it to show their parents what we have been up to.
STEAM Showcase:
This board looks a bit bare now but the idea is that I will fill the STEAM Showcase with examples of great work. As we work mostly digitally, I didn't have a place to display student work last year. I think this board will help motivate my students when they see examples from their peers being displayed. I used the super, free, STEAM Monster posters on Teachers Pay Teachers.
The Biggest Change to the Lab:
Just before school closed at the end of last year I had asked for wires to be installed in the lab. The idea for these wires originally was to display student work but, after racking my brains the whole holiday, I finally had a better idea.
Right before school opened this term, I had a very diligent student helper who helped me punch holes into about 80 old CDs and DVDs that I sourced from my colleague. We strung these CDs onto colourful yarn and then hung them up all across the lab.
The change has been quite striking and it's charming to see the CDs dancing in the breeze. The new decor has also spurred some conversations with students about why we use CDs for (data storage), why we are using CDs for decoration (becoming obselete) and what we use now instead of CDs (cloud, flash/usb sticks). The older visitors to the lab have been having fun reading the titles of the motley collection of CDs, there are a few old games CDs tucked away in the corners of the room.
The pictures don't quite do it justice, they are quite animated little decorations - especially when the air-conditioning is on!
Thursday, November 16, 2017
Exploring and Tinkering: My first time using Blue-Bots
After a successful proposal, I have been lucky enough to have adopted 12 new 'devices' into my IT Lab:
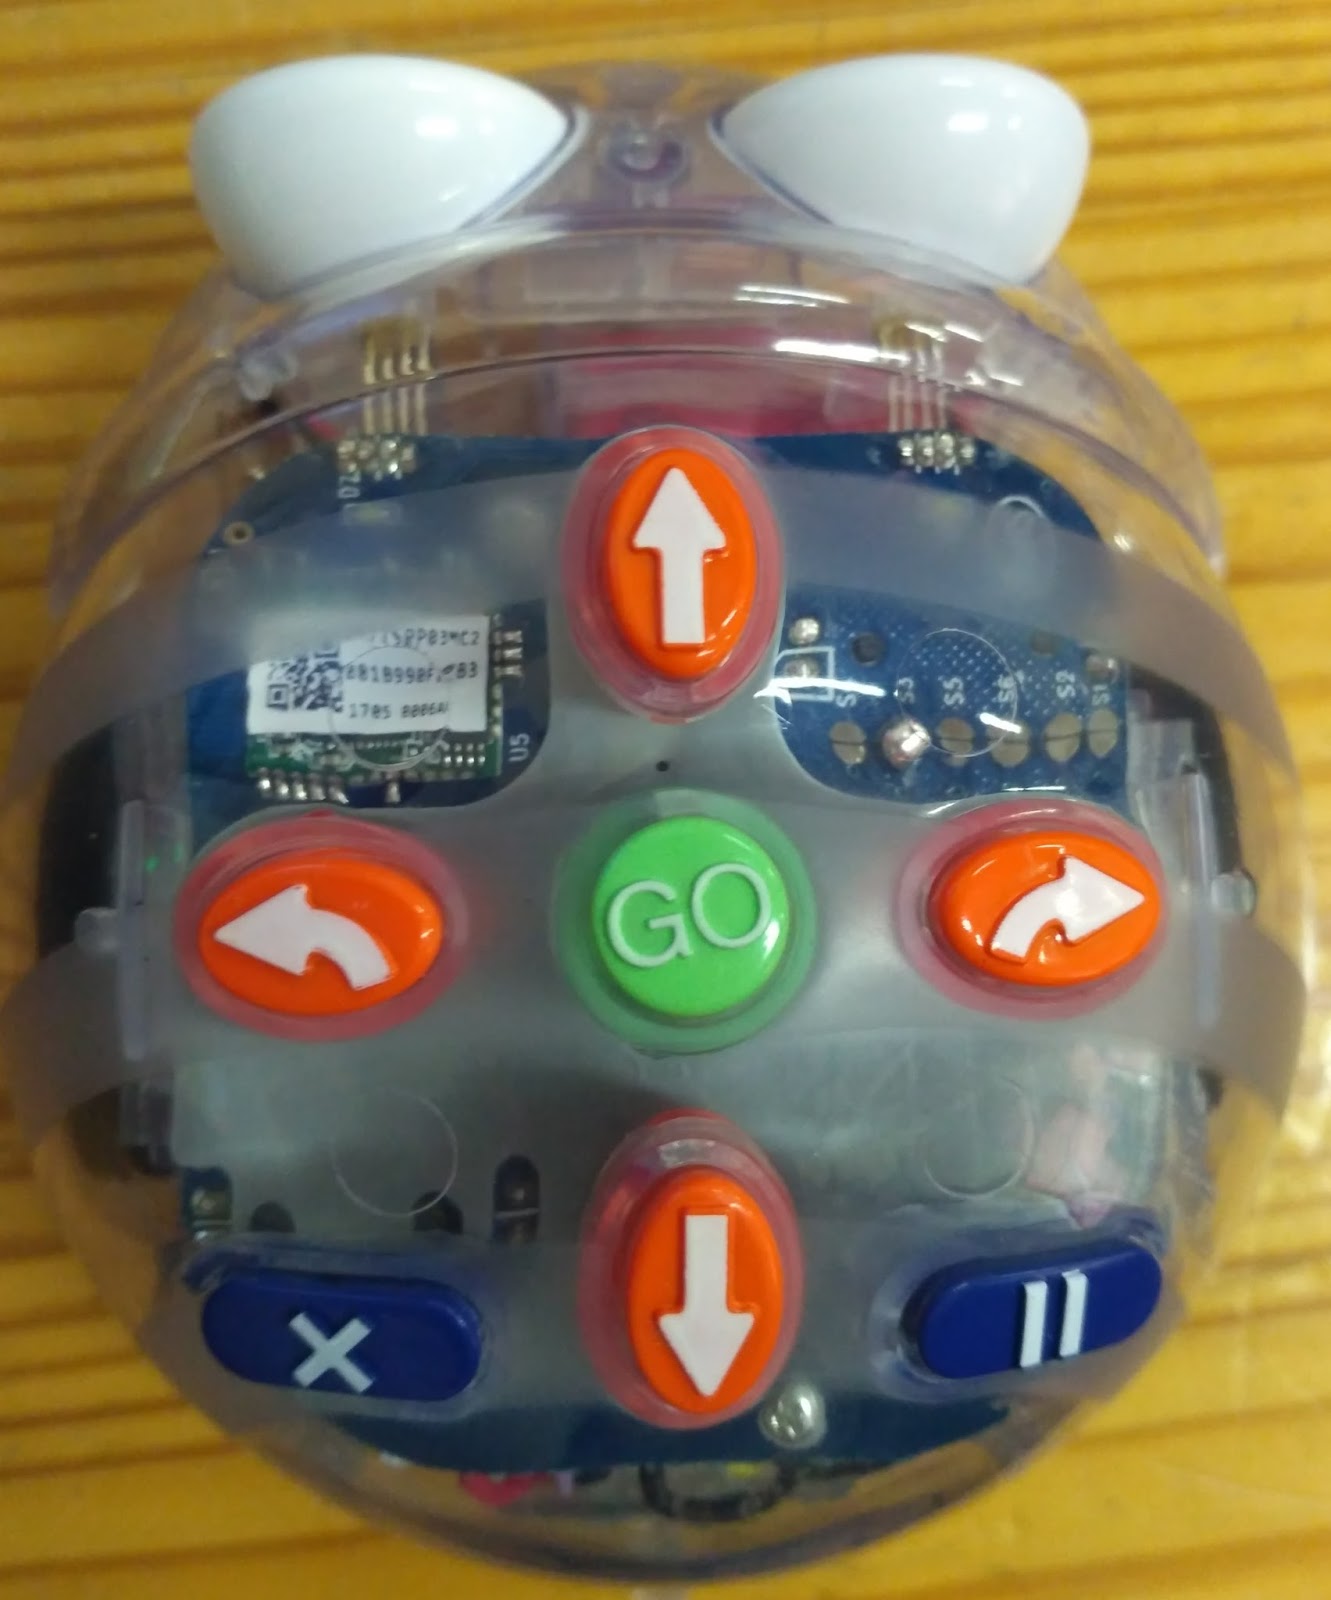
Say hello to the Blue-Bots! They have become, by far, the most exciting thing in the IT Lab (sorry, iPads). Blue-Bots are sturdy little robots with cute expressions and buttons on top.
I had specifically requested the Blue-Bots for a number of reasons:
Introduction lesson: Blue-Bots
Exploring
This lesson happens after we've had a lesson on Crazy Characters and algorithms. We sit together on the carpet while I explain these are robots that work using algorithms and remind them what that means. We investigate the bots while they are switched off. We pass the bots around and ask questions and wonder out loud together. We look at all the parts we can see and discuss how they could work, and what we think the parts do. The Blue-Bots shine in this stage because of the clear plastic shell and how we can wonder about all the inside parts and what they do. This exploring phase is so important as the students gain a better understanding of what the purpose of the bot is rather than just treating it as a toy.
Tinkering
When we have fully mined out all of the possibilities of looking at the Blue-Bots while they are switched off, I remind the students about the benefits of working with a partner while solving puzzles. The best benefit of a partner is that you can always come up with new ideas together (brainstorm). I encourage them to use the pair programming concept of driver/navigator roles in order for them to take turns and for both partners to be actively involved in the learning rather than one just sitting passively. I give the students the hint that the bots use algorithms, and that buttons need to be pressed in a certain order for them to move.
After that, I let them loose in the room with their bot and their partner for most of the lesson. I delibrately don't teach them how the bots work at first. They try the Blue-Bot out on the desks, on the floor, under the desks, on any random surface. Many of them soon figure out that there needs to be a way to clear previous commands, so after a few minutes I bring them back to the carpet to model what to press in order to clean the memory and start with a new algorithm.
As students find a problem, I encourage them to try to solve it. Once a group of students have found a solution, I get them to teach others.The students need this tinkering time with the bots in order to try out their wacky ideas and eliminate what the bot can and cannot do. If needed, I bring the group to the carpet to deliberately teach a function or correct a misconception.
Next steps?
After the introductory free-roam lesson, the next steps are to give the students some more structured challenges. After the tinkering phase, they feel as if they are much more experienced bot 'programmers' and confidently approach challenges as they now understand how the basic mechanics work.
I plan to involve marching and dance in my follow-up lessons, as my students particularly enjoyed making the bots move in sync with each other. Another option is to get the Blue-Bots to move in shapes such as squares and rectangles, and getting students to record their algorithms before they program them into the bot.
I am pleased to report than a number of the class teachers have been very inspired by the students' enthusiasm and have given their own ideas for future projects. I am so pleased that other teachers see the potential of co-curricular ideas with these fantastic little devices.
Getting your hands on some Blue-Bots
This is a note only for South African technologists, but my school had great success in sourcing bots from a local company called Edit Microsystems. They have been nothing but helpful in shipping and getting the bots couriered to us. We also purchased 2 charging docks, which have been invaluable in giving us as less chaotic charging situation.
Say hello to the Blue-Bots! They have become, by far, the most exciting thing in the IT Lab (sorry, iPads). Blue-Bots are sturdy little robots with cute expressions and buttons on top.
I had specifically requested the Blue-Bots for a number of reasons:
- The buttons on top of the robot are the primary input. This is perfect for young students as they need concrete experiences to properly understand Computer Science concepts.
- At the same time, the Blue-Bots can later be used with an app via Bluetooth. This gives the robot more versatility at older ages. 45 turns and repeats can be achieved through the app.
- Clear plastic shell means that my students can see the inner workings of the Blue-Bot. This has utterly fascinated my children and already lead to conversations about motors, batteries, motherboards, speakers, input/output and all sorts of hardware bits.
- Reliable: Bee-Bots and Blue-Bots have a good reputation for being robust and ideal for my young students and their sticky fingers.
Exploring
This lesson happens after we've had a lesson on Crazy Characters and algorithms. We sit together on the carpet while I explain these are robots that work using algorithms and remind them what that means. We investigate the bots while they are switched off. We pass the bots around and ask questions and wonder out loud together. We look at all the parts we can see and discuss how they could work, and what we think the parts do. The Blue-Bots shine in this stage because of the clear plastic shell and how we can wonder about all the inside parts and what they do. This exploring phase is so important as the students gain a better understanding of what the purpose of the bot is rather than just treating it as a toy.
Tinkering
When we have fully mined out all of the possibilities of looking at the Blue-Bots while they are switched off, I remind the students about the benefits of working with a partner while solving puzzles. The best benefit of a partner is that you can always come up with new ideas together (brainstorm). I encourage them to use the pair programming concept of driver/navigator roles in order for them to take turns and for both partners to be actively involved in the learning rather than one just sitting passively. I give the students the hint that the bots use algorithms, and that buttons need to be pressed in a certain order for them to move.
After that, I let them loose in the room with their bot and their partner for most of the lesson. I delibrately don't teach them how the bots work at first. They try the Blue-Bot out on the desks, on the floor, under the desks, on any random surface. Many of them soon figure out that there needs to be a way to clear previous commands, so after a few minutes I bring them back to the carpet to model what to press in order to clean the memory and start with a new algorithm.
As students find a problem, I encourage them to try to solve it. Once a group of students have found a solution, I get them to teach others.The students need this tinkering time with the bots in order to try out their wacky ideas and eliminate what the bot can and cannot do. If needed, I bring the group to the carpet to deliberately teach a function or correct a misconception.
Next steps?
After the introductory free-roam lesson, the next steps are to give the students some more structured challenges. After the tinkering phase, they feel as if they are much more experienced bot 'programmers' and confidently approach challenges as they now understand how the basic mechanics work.
I plan to involve marching and dance in my follow-up lessons, as my students particularly enjoyed making the bots move in sync with each other. Another option is to get the Blue-Bots to move in shapes such as squares and rectangles, and getting students to record their algorithms before they program them into the bot.
I am pleased to report than a number of the class teachers have been very inspired by the students' enthusiasm and have given their own ideas for future projects. I am so pleased that other teachers see the potential of co-curricular ideas with these fantastic little devices.
Getting your hands on some Blue-Bots
This is a note only for South African technologists, but my school had great success in sourcing bots from a local company called Edit Microsystems. They have been nothing but helpful in shipping and getting the bots couriered to us. We also purchased 2 charging docks, which have been invaluable in giving us as less chaotic charging situation.
Monday, October 02, 2017
Pirate Cove Part 2: Digital Project-Based Learning in Minetest
This is post 2 of a two-part series on using Minetest to explore project-based learning with Grade 3 students. Click here to read Pirate Cove Part 1: Digital Project-Based Learning in Minetest.
Step 4: Check
I included a checking step in the project: all of the 'paperwork' had to be done before the teams could earn building time in the game. This was an opportunity for all of the student teams to finish the research and design phases and help anybody in the class that needed extra help. I emphasised that our pirate town is a community and we all had to help each other. This mentality was later seen in the building phase as students asked to help other teams finish their buildings. Our lessons during this project were quite intense and busy for me and this built-in checking step helped me actually have a chance to look over their written work and ask students to adjust their work if needed.
Step 5: Build!
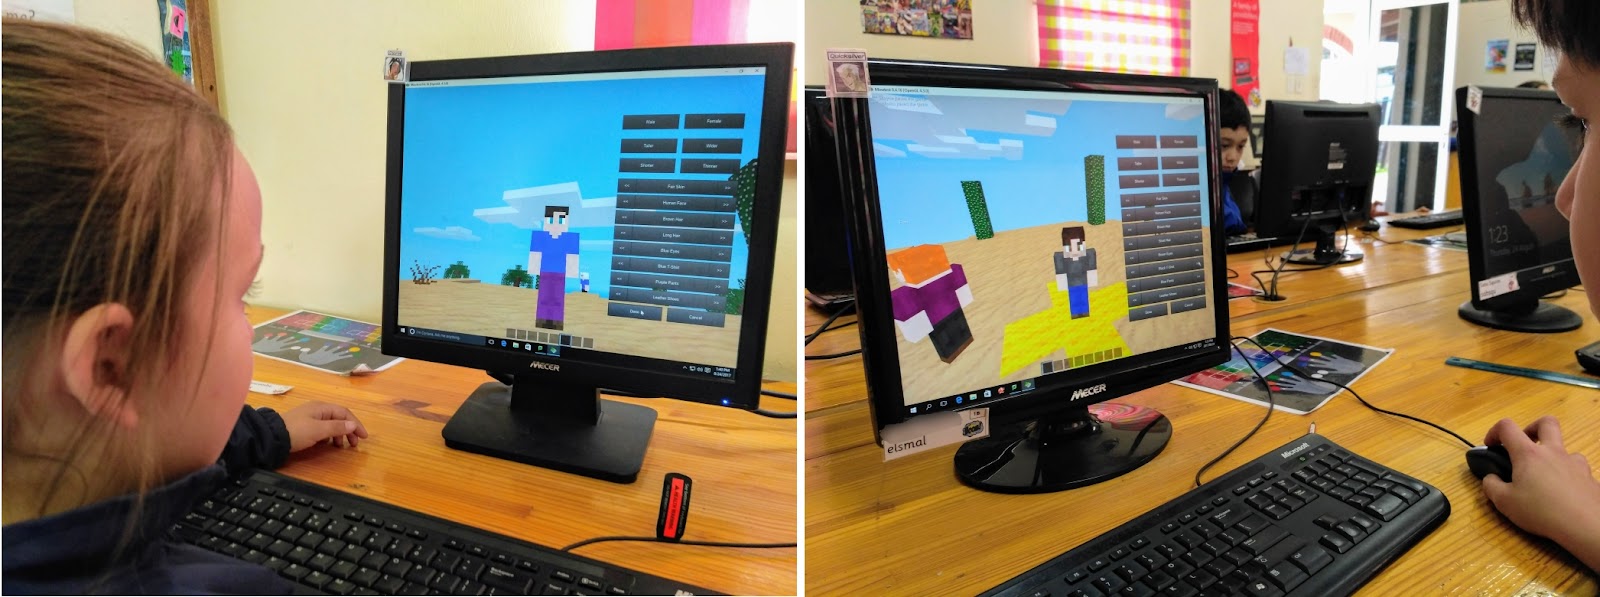
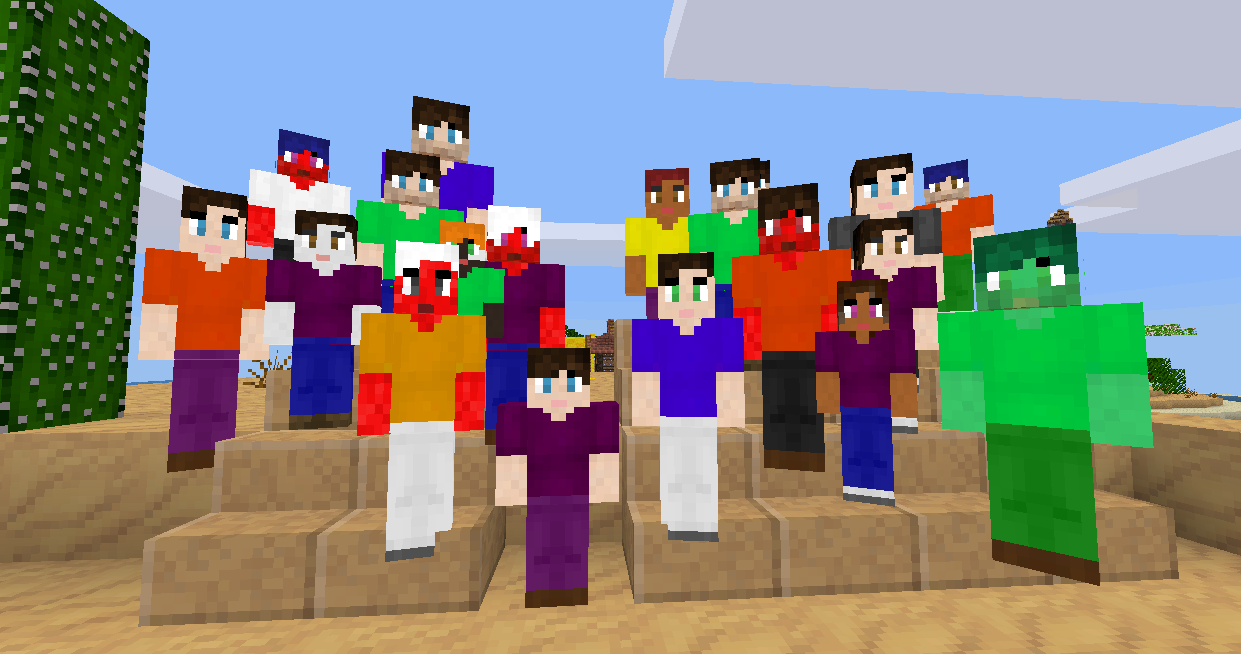
This was the highlight of the project for the students and the part that provided the motivation to complete all of the previous steps! The students logged in and we spent a chaotic first session getting used to the controls, the map we were building on and the plots that the teams were allocated. My students impressed me with their levels of cooperation, they really tried very hard to follow the rules of Parley and stay focused on their objectives. Despite a large range of skill levels, the students helped each other learn basic tips and tricks to make their building projects a success. I rewarded the most helpful pirate of the week with permission to wear a gold medallion which further helped to incentivise helpful behaviour.The Minetest version we used allowed for the students to customise the appearance of their character, which was massively popular. This feature had the side effect of teaching the students about using Function keys on the keyboard (F7 changed camera perspective) and the importance of a correct username (if they logged in with a differently spelt username they lost their customisation).
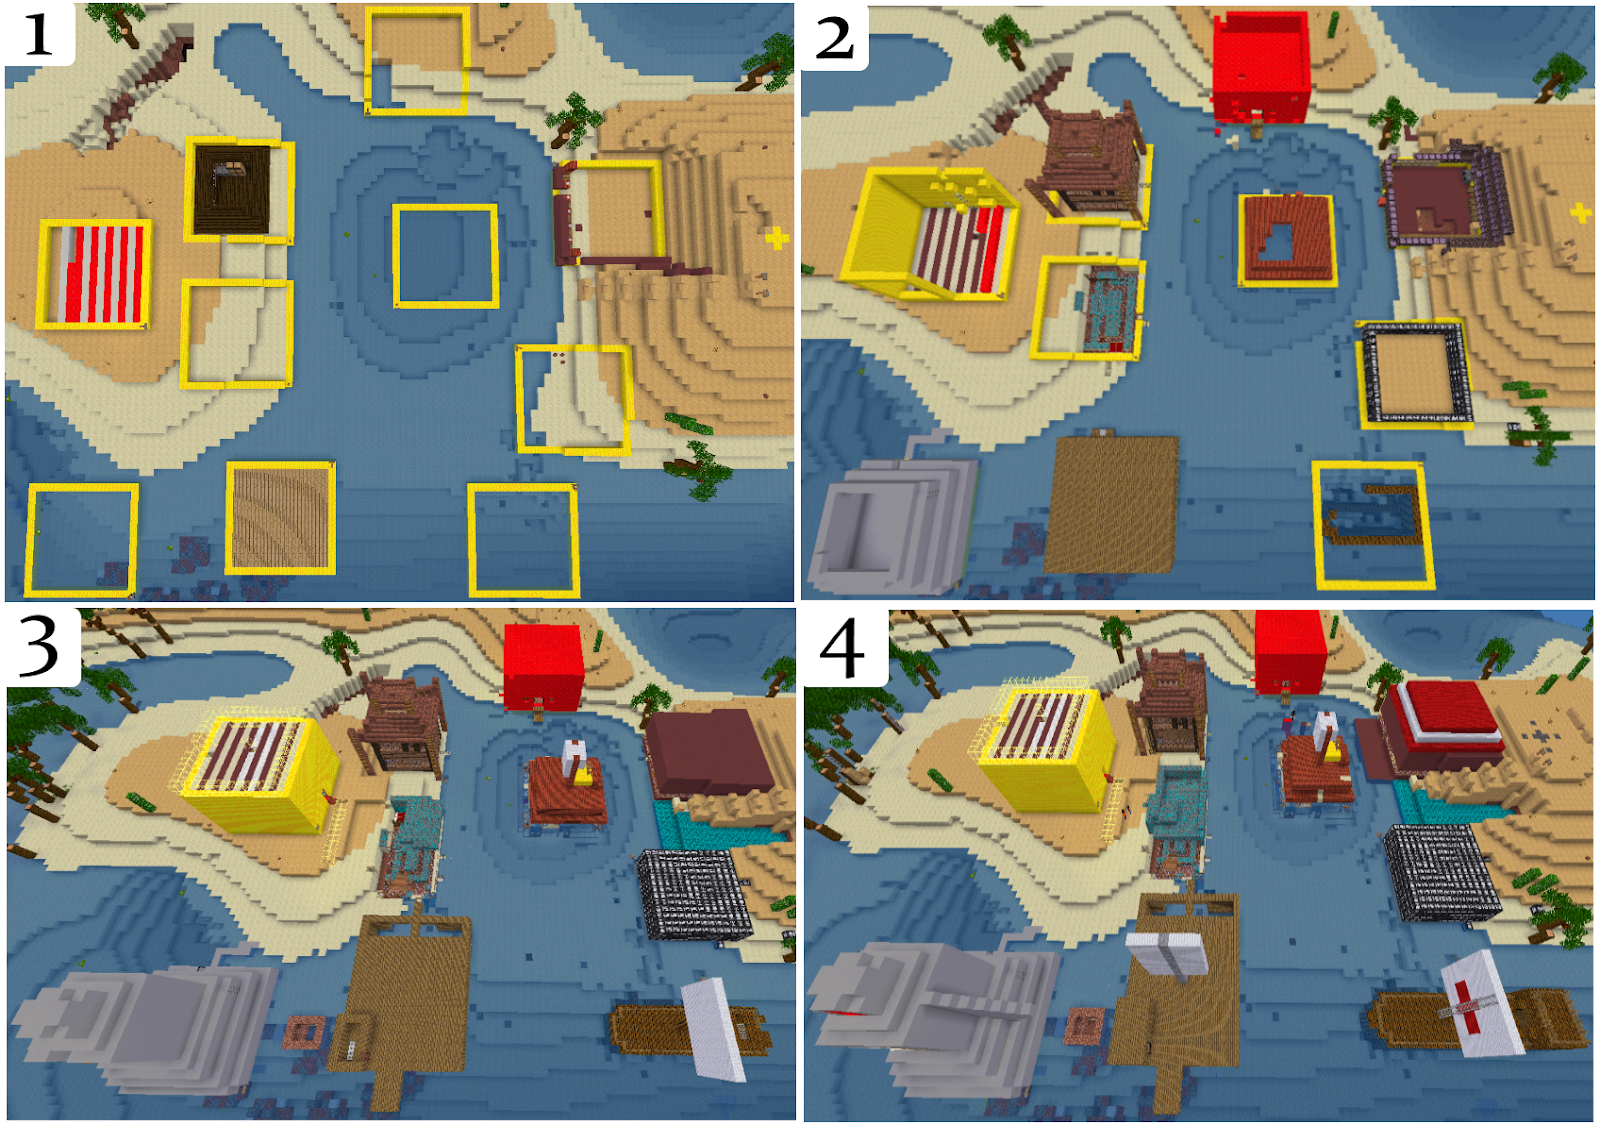
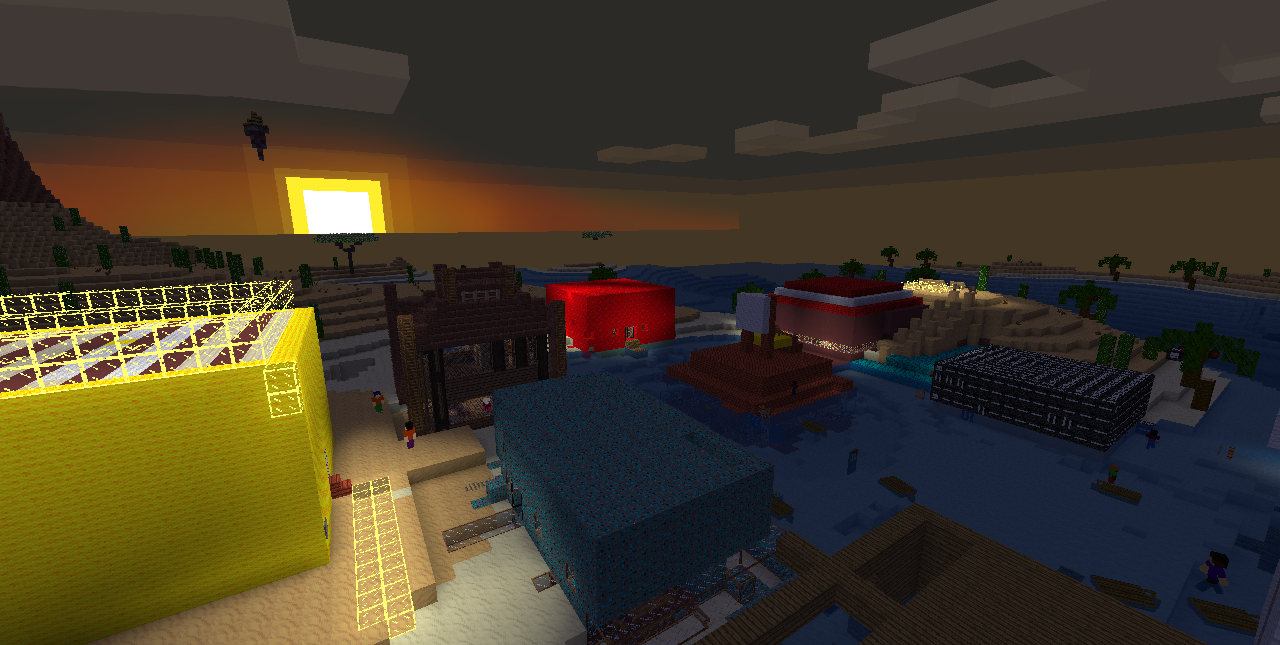
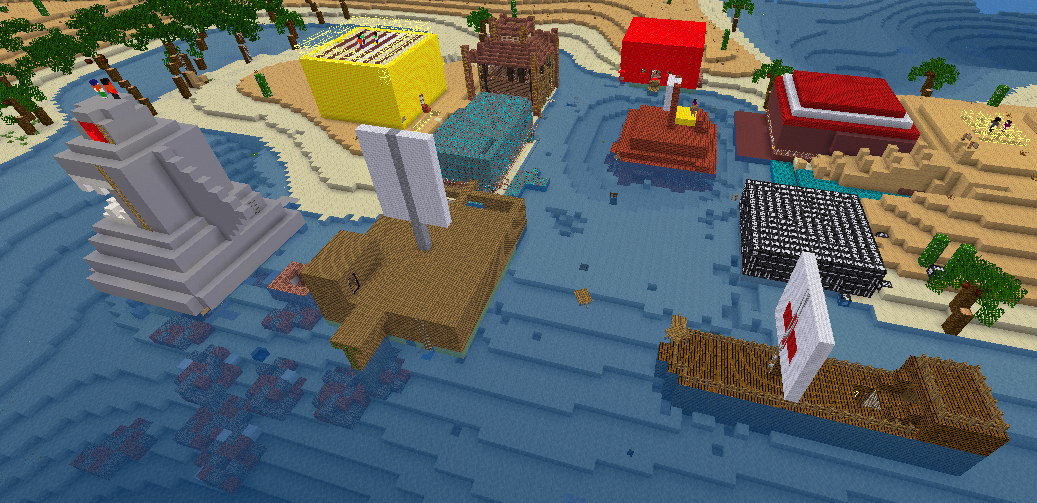
We constructed our pirate coves for a total of 4 hours = 1 hour per lesson. In that limited time both classes finished their assigned buildings and worked together to improve their towns. Students came up with original ideas to customise their town: one class worked on a large statue with a pirate hat and another class came up with the idea of creating a path to join up their buildings. Here a sample of one pirate cove being built up over the four lessons.
The final lesson was set aside for students to leave their plots and walk around the town, exploring what they had built together. At their request, I set the game time to night in order for us to see pirate cove lit up from the light of the lighthouses and other buildings. At the end of the lesson, I asked the students to park their character in a spot of their choosing as we turned the server off for the last time. Most of them chose either a beautiful viewpoint or inside the building they had made. One student gave this advice:
When the time comes to turn the server off forever, make sure you go somewhere with a good view.
Poignant!
Click here to view a slideshow of screenshots from our finished pirate cove project.
Step 6: Reflection
The students learned how to take a screenshot on a computer (print-screen key) and paste it into Microsoft Paint. After saving it, they imported the screenshot into their Building Quest document and completed a reflection page about the project. We then discussed advice we would give next year's students:
- Don't jump into deep holes looking for shiny rocks, you will get stuck.
- Work as a team and listen to your partner's ideas.
- Keep your idea simple, don't let it get too complicated.
- When you dig don't dig straight down, it's dark.
- Ask people for help if you need it.
- Don't sit in chairs, you will get stuck. (we had a few glitchy chairs)
I feel this is a refreshing mix of advice relevant to the game and also to wider contexts!
Step 7: Learning
Learning areas for this project included:
Digital literacy:
- Online interactions and appropriate behaviour
- Online research
- Integrated studies: Pirates
ICT skills:
- Software: Minetest
- Software: Google Slides
- Software: Microsoft Paint
Computational thinking approaches:
- Collaboration
- Persevering
- Creating
- Tinkering
The students and myself thoroughly enjoyed the experience of project-based learning in ICT this term. The maps for each pirate cove have been saved for posterity and future showcases.
Completed Building Quest Projects:
Pirate Cove Part 1: Digital Project-Based Learning in Minetest
Ahoy! Welcome to Pirate Cove!
Digital Project-Based Learning in Grade 3
Background: Objective
Background: Technical
Minetest was my chosen Minecraft clone because it was free and runs well on the computer lab Windows machines. It also runs locally which means that it didn't require any bandwidth or internet to run. Each student used a Windows desktop to access their project document (Building Quest) as well as build on Minetest. The students had briefly experimented with Minetest last year and some remembered it fondly, but this project was the first time any of them had spent longer than an hour with the game. I've written more about Minetest on my blog here.Step 1: The Building Crew
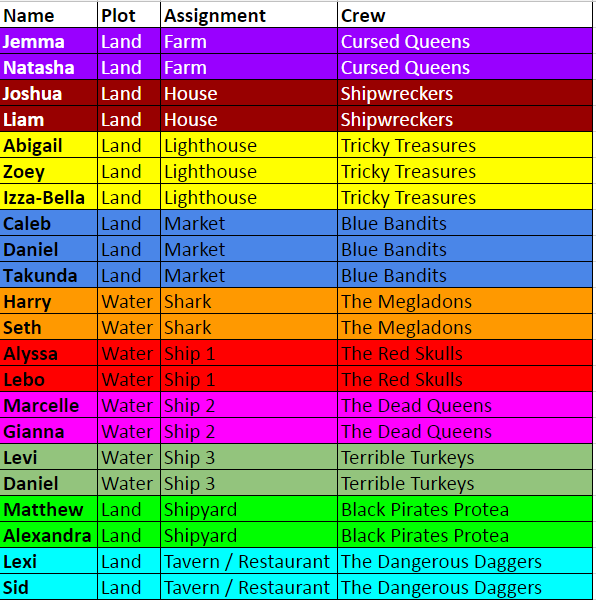
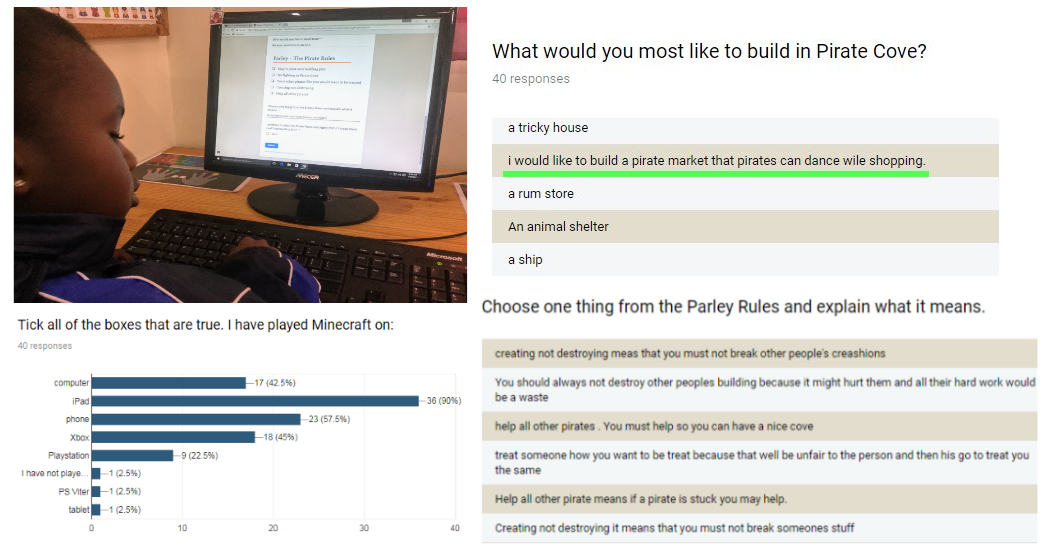
The first step for us was to determine what we were building. The first lesson was taken up with explaining the parameters of the project, our goals, and giving the students time to come up with ideas. They filled in this Google Form so I could gather data about how much experience they had in Minecraft/Minetest and what they wanted to build. I used their responses to build up a number of teams (building crews) in each class, roughly based around what the students requested. I also used this step to introduce our rules of Parley, which covered expected behaviour to work together and not cause any trouble.The survey allowed me to gather data from the students and sort them into compatible teams. The students were sorted to balance out experience at this kind of game and type of building they wanted to work on. They chose the crew names themselves and became quite attached to their colours!
Step 2: Research
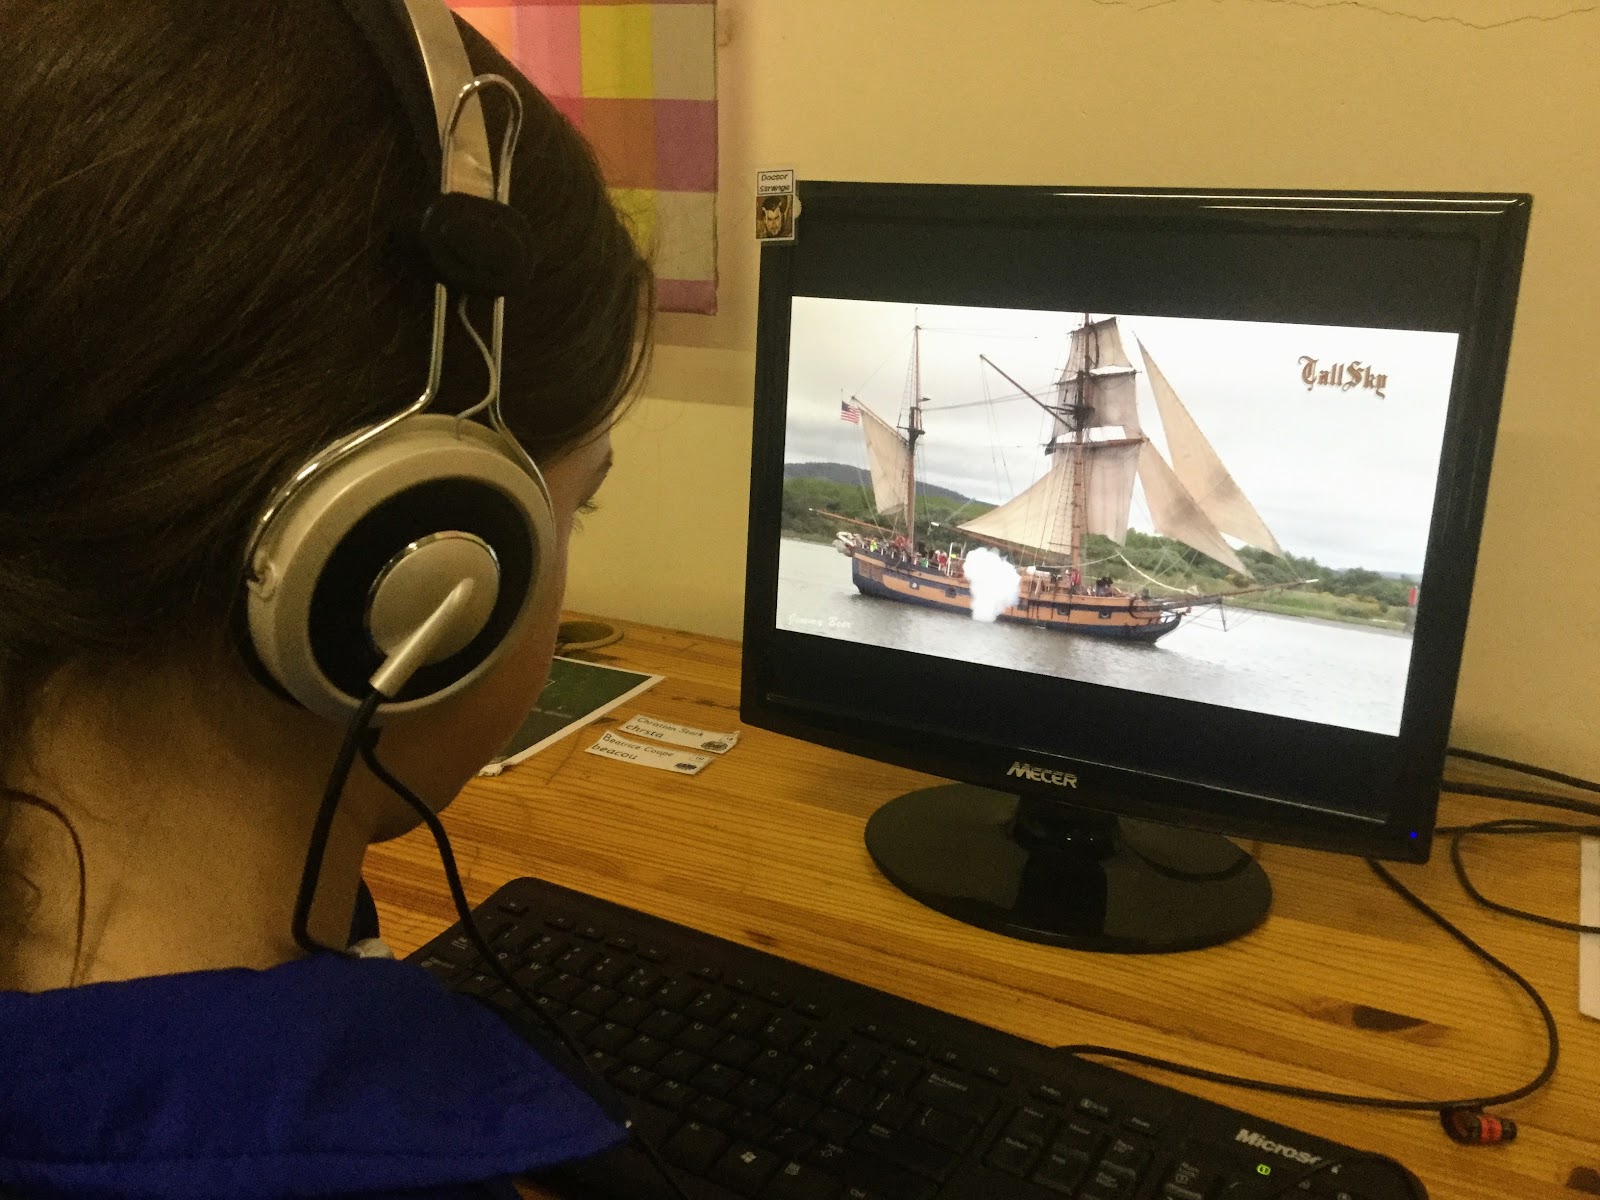
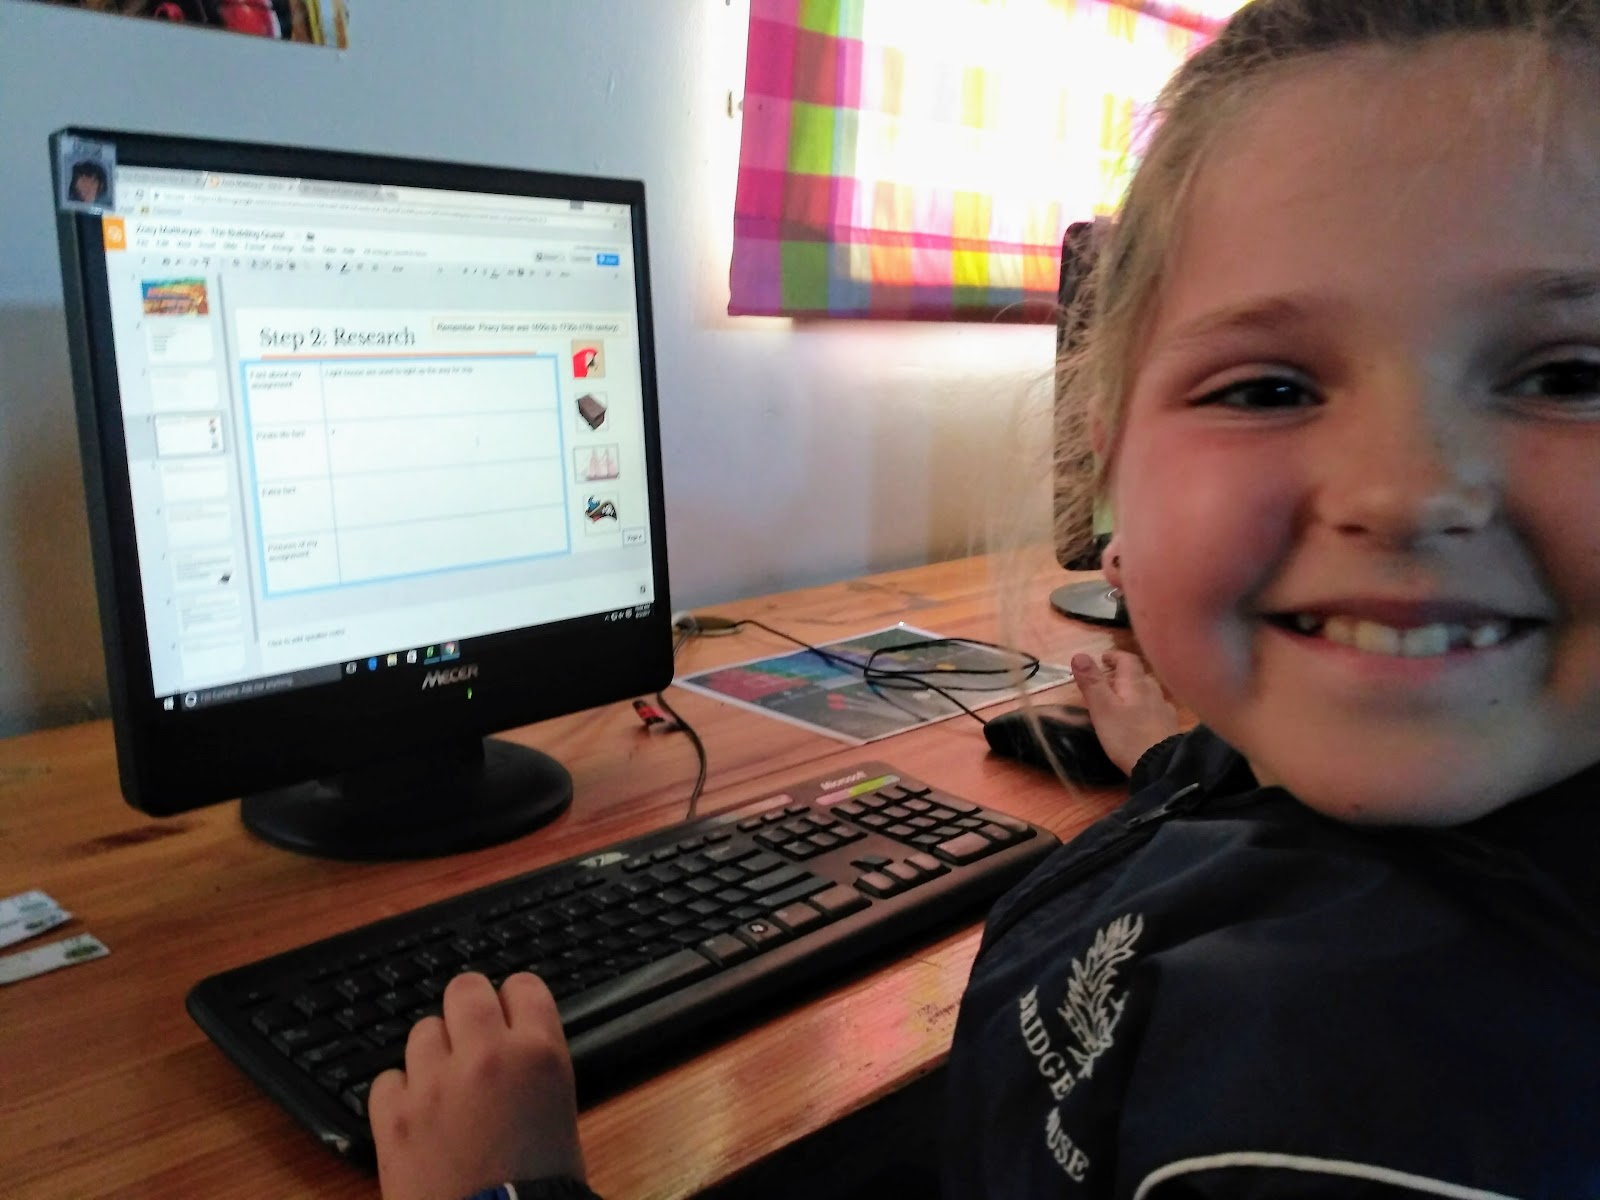
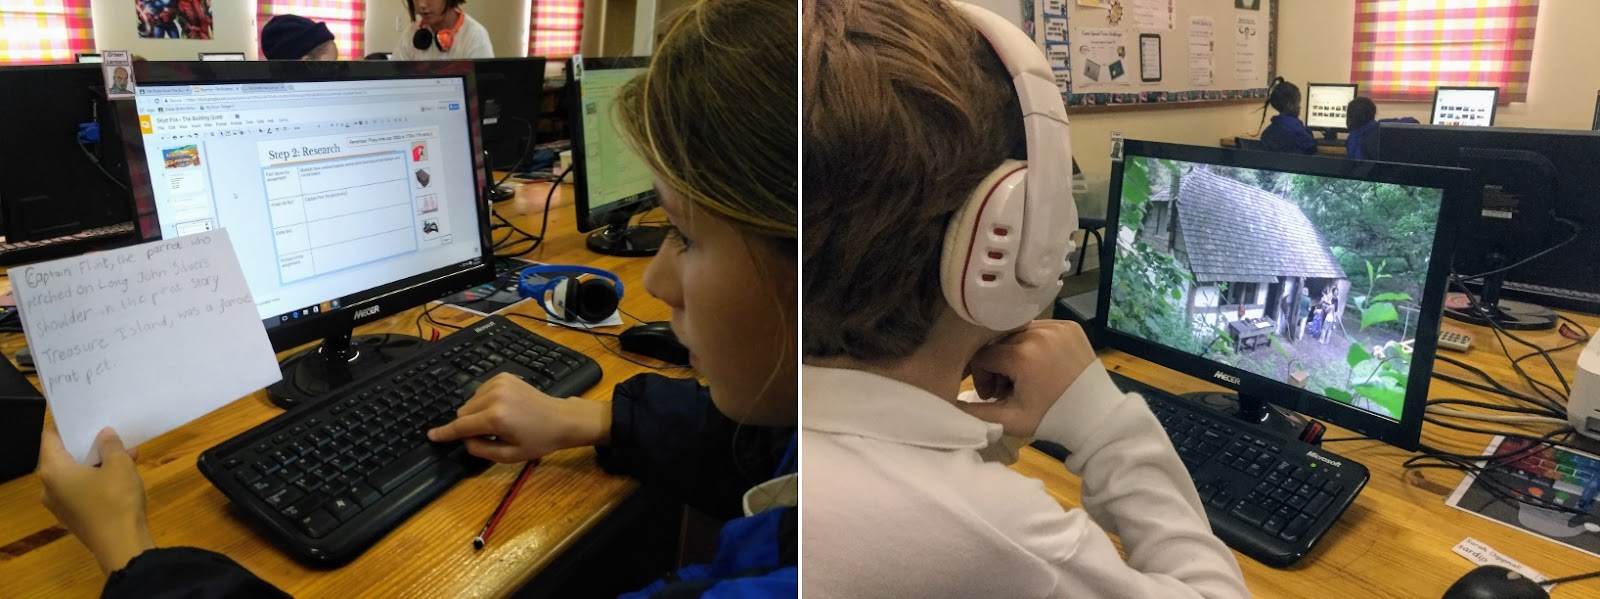
The students were sorted into their teams and we rearranged the seating plan so that teams could sit next to each other. While this created a delay in the beginning with logging into new machines and profiles, in hindsight this was an excellent choice as it helped students work together with their partners. They started work on a structured research task to find out more about their building assignment. The students each worked in a Google Slides workbook (Building Quest) where they completed all of their 'paperwork' for the task. There are links to samples of completed workbooks at the end of this write-up.Students used a bank of suggested websites as well as saved videos to learn more about their building assignment. They had to try and find out information about the types of materials that would have been used to build their assignment in real life during the 16-17th century. Each step of the project was clearly laid out and teams were able to move ahead with the next step as soon as they felt ready to. I was able to take certain teams aside to give them individual support to complete a task they needed more help with. This differentiated approach was a new experience in the ICT lab and the students appreciated being able to work at their own pace.
Step 3: Design
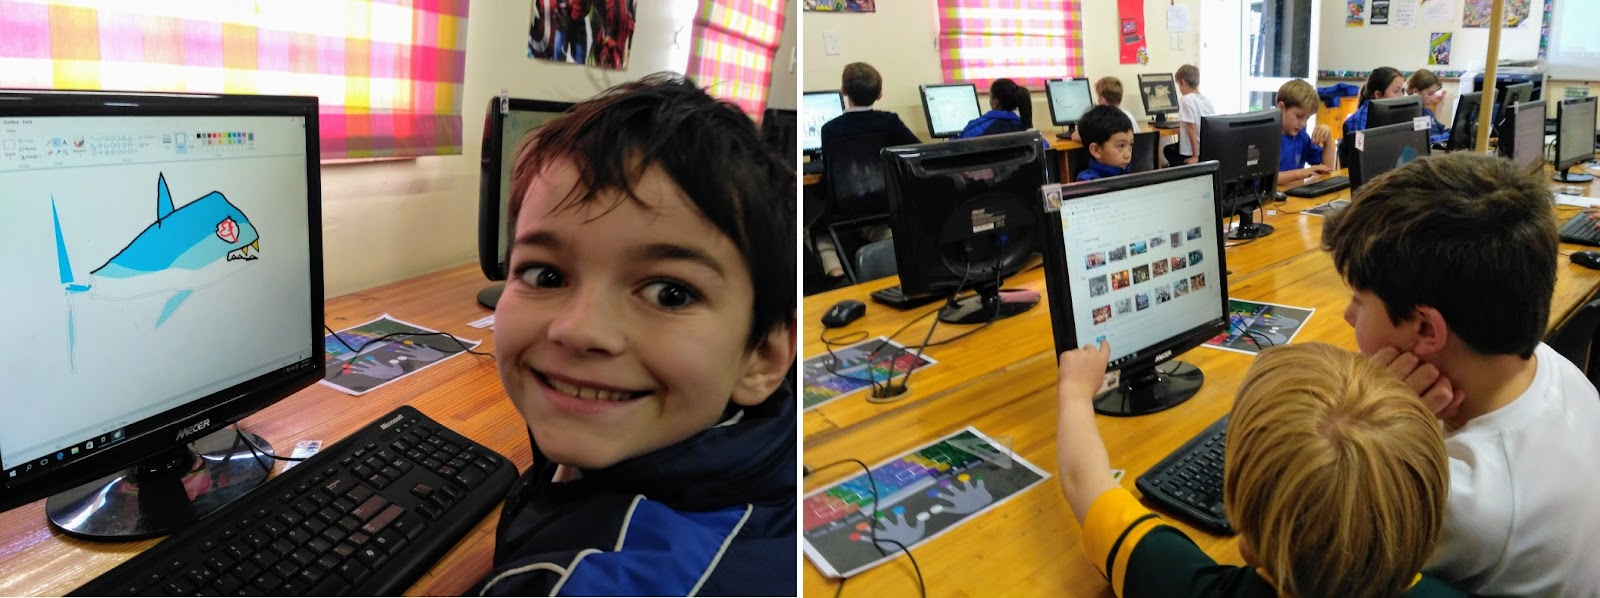
Once the research task was complete, students moved onto the design phase. They used Microsoft Paint, a new program for us, to sketch out a proposed design for their building. The students largely learned how to use Paint from each other. For the group of students that needed it, I ran a brief tutorial on the basics of the program. Afterwards, the students saved their design (giving the image file a good name!) and imported it into their Building Quest document. The next phase was to label their design to give it more detail, then complete a 5 sentence write-up of what their design would be made of.I believe that including this design step helped the students become much more invested in the later process of building. I was blown away by the quality of their work!
This is post 1 of a two-part series on using Minetest to explore project-based learning with Grade 3 students. Click here to read Pirate Cove Part 2: Digital Project-Based Learning in Minetest.
Monday, August 14, 2017
5 Awesome Starting Activities on Seesaw
Hello, internet!
I wanted to post an update about using the Seesaw app with our Junior Primary shared iPad lab. Seesaw has been a fantastic tool in our classrooms here at Bridge House School. It's a brilliantly simple app and it often takes very little time for a teacher to understand how it works. The first snag can come, though, when you want to begin using it with your students but aren't sure where to start. This term I've been guiding my Junior Primary colleagues through Seesaw and many now feel ready to start using it on their own with their students (yay!). The important thing to remember is that Seesaw is a tool to record and reflect on learning. Add Seesaw to enhance learning and it will be hard to go wrong.
To help with getting started, here is a list of the top 5 activities that I have done with students ages 6 - 9 (Grades 1 - 3) on Seesaw using our iPads. It's in countdown format, but all have been equally fun and valuable.
I wanted to post an update about using the Seesaw app with our Junior Primary shared iPad lab. Seesaw has been a fantastic tool in our classrooms here at Bridge House School. It's a brilliantly simple app and it often takes very little time for a teacher to understand how it works. The first snag can come, though, when you want to begin using it with your students but aren't sure where to start. This term I've been guiding my Junior Primary colleagues through Seesaw and many now feel ready to start using it on their own with their students (yay!). The important thing to remember is that Seesaw is a tool to record and reflect on learning. Add Seesaw to enhance learning and it will be hard to go wrong.
To help with getting started, here is a list of the top 5 activities that I have done with students ages 6 - 9 (Grades 1 - 3) on Seesaw using our iPads. It's in countdown format, but all have been equally fun and valuable.
5 Awesome Starting Activities on Seesaw
Friday, July 14, 2017
Seesaw: The app that changed everything
Maybe that's an overly-dramatic title for this post: the app that changed everything! Seesaw came along and did completely change how I think about using iPads in Junior Primary, though.
Seesaw has been on my radar as a portfolio-type app for years, so their icon was familiar. The first time I opened it I saw a login screen and immediately ruled it out as not useful for my situation. Here is my situation:
My colleague, @mrkirkbhs, pointed me back to Seesaw earlier this year as he had heard good things about it being used for younger grades. I have been given more earmarked time for iPad use this year and, in an effort to make that time more meaningful, I went back and had another look at Seesaw. Just past the dreaded login screen is the fantastic trick that makes Seesaw fit my situation:
Seesaw offers a class-level login based on QR code! This makes it ideal for shared iPads with young students!
This is amazing for two reasons:
QR code: No alpha-numeric login for my students to remember or type in on the tricky iPad keyboard. They just tap "I'm a student" then hold the iPad up like they are taking a photo of the code and voila! They are logged in to the main hub of Seesaw, ready to create content.
Class-level login: This is fantastic for my young students. From the main menu they create content then, when they are finished with it, they 'tag' their work by selecting their name from a list (or multiple names if it is group-work). Again, this removes any problems with spelling login names incorrectly and puts the student's work at the heart of Seesaw.
What have my students been able to do with Seesaw?
Seesaw has opened the door for my young students. Whereas before, the iPads were really only being used for drill work and games, Seesaw allows a child to record their learning. This is huge. Imagine Seesaw being a digital journal, where the student can add drawings, text, voicenotes and video - even on top of imported images. This allows the student to annotate and explain, and share their learning with their classmates.
Seesaw has a family app where families of the students can be invited to participate in the shared learning: next term I will be introducing that to my classes. I will also be making more of an effort to show the brilliant features of Seesaw to my Junior Primary colleagues, so that they can also gain the benefit of having a digital journal ready and waiting in their classroom space.
- A class-sized set of iPads
- Shared in a mobile lab
- No guarentee you would get the same iPad each time
- Users are 9 years old or younger
My colleague, @mrkirkbhs, pointed me back to Seesaw earlier this year as he had heard good things about it being used for younger grades. I have been given more earmarked time for iPad use this year and, in an effort to make that time more meaningful, I went back and had another look at Seesaw. Just past the dreaded login screen is the fantastic trick that makes Seesaw fit my situation:
Seesaw offers a class-level login based on QR code! This makes it ideal for shared iPads with young students!
This is amazing for two reasons:
QR code: No alpha-numeric login for my students to remember or type in on the tricky iPad keyboard. They just tap "I'm a student" then hold the iPad up like they are taking a photo of the code and voila! They are logged in to the main hub of Seesaw, ready to create content.
Class-level login: This is fantastic for my young students. From the main menu they create content then, when they are finished with it, they 'tag' their work by selecting their name from a list (or multiple names if it is group-work). Again, this removes any problems with spelling login names incorrectly and puts the student's work at the heart of Seesaw.
What have my students been able to do with Seesaw?
Seesaw has opened the door for my young students. Whereas before, the iPads were really only being used for drill work and games, Seesaw allows a child to record their learning. This is huge. Imagine Seesaw being a digital journal, where the student can add drawings, text, voicenotes and video - even on top of imported images. This allows the student to annotate and explain, and share their learning with their classmates.
Seesaw has a family app where families of the students can be invited to participate in the shared learning: next term I will be introducing that to my classes. I will also be making more of an effort to show the brilliant features of Seesaw to my Junior Primary colleagues, so that they can also gain the benefit of having a digital journal ready and waiting in their classroom space.
Sunday, June 04, 2017
Children and Bad News: advice for helping children deal with world events
Waking up to news about another terror attack in London, I thought I would send out this collection of resources to help with conversations around scary events on the news.
First, there is an up-to-date excellent article and accompanying video written by BBC's Newsround (their childrens' news outlet) just after the Manchester bombing. It is comforting and practical, and aimed at the child. I listed this article first as I found it so effective in putting bad news in the context of your own life.
- (Article/Video) Advice if you're upset by the news
Next, here is a clip featuring Mr Rogers, taken from his American children's show, aimed at young children. His references are dated (Lennon, Reagan) but his advice is solid gold about what to do when encountering news about bad people and violent events.
On the PBS Parents site there is an article aimed at grown-ups about how to help children deal with scary news:
- (Article) Helping Children with Scary News
This last link is aimed at adults though could be of use when discussing bad news with children. The anxiety caused by bad news and the constant negative 24-hour news cycle can have a serious toll on our mental health. Here is an article about handling that anxiety about the bad events we see on the news:
Fred Rogers often told this story about when he was a boy and would see scary things on the news: “My mother would say to me, ‘Look for the helpers. You will always find people who are helping.’ To this day, especially in times of disaster, I remember my mother’s words, and I am always comforted by realizing that there are still so many helpers — so many caring people in this world.”
I hope these links can be helpful in your classrooms.
Sunday, May 21, 2017
Scratch Jr: Perfect for New Coders
Phew, this has been a bumper crop of blog posts this week! These activities and photos were all captured earlier in the term but I haven't had the time to write them up until now.
After our Unplugged week, we started with Scratch Jr. There were two reasons for this. Firstly, it seemed like a natural progression from solving concrete puzzles on the floor with 'arrow code' on whiteboards to Scratch Jr's block code, largely featuring arrows. The other reason was that our school network was still recovering from the lightning damage and my plans to use Google Slides were on hold due to no connectivity. So, we dived right back into more coding.
I immediately found that Scratch Jr was completely accessible to students of all ages. The blocks are large and intuitive and the app comes loaded with a large number of sample projects that you and your students can pick apart for ideas. Once I gave them a short intro session to get them comfortable with the layout of the app, my students tucked in under the tables and gave it a go. I hope my students aren't the only ones who enjoy hiding under the desks when working with iPads? They almost all choose it over sitting at their tables.
From the beginning, the narrative prospects of Scratch Jr shone. Students wanted to tell stories with it, right away utilising the voice recording block to add sound effects and speech to their creations. Student choreographed dance routines and loved the stage background where they could showcase their dancers. My Grade 0 students particularly loved the activity where we turned the default Scratch Cat into a space cat and got it to dance. This project let them display their creativity with altering the Scratch Cat sprite and no child had the same outcome as another.
After our Unplugged week, we started with Scratch Jr. There were two reasons for this. Firstly, it seemed like a natural progression from solving concrete puzzles on the floor with 'arrow code' on whiteboards to Scratch Jr's block code, largely featuring arrows. The other reason was that our school network was still recovering from the lightning damage and my plans to use Google Slides were on hold due to no connectivity. So, we dived right back into more coding.
I immediately found that Scratch Jr was completely accessible to students of all ages. The blocks are large and intuitive and the app comes loaded with a large number of sample projects that you and your students can pick apart for ideas. Once I gave them a short intro session to get them comfortable with the layout of the app, my students tucked in under the tables and gave it a go. I hope my students aren't the only ones who enjoy hiding under the desks when working with iPads? They almost all choose it over sitting at their tables.
The possibilities of Scratch Jr are vast. I can see multiple grades using this app to recreate familiar narratives like The Three Little Pigs and programming the sprites to move to enhance their story. I can see older grades using it to make a choice story - one where a choice the player makes changes what happens in the game. We will defninitely be using a lot more of Scratch Jr.
![]() |
| "It's an evil cake and the red block makes it go around over and over again." |
Unplugged: Coding using Grids
Over the last term holidays, we were unlucky enough to have lightning strike near to our school during a storm. We lost large portions of our network switches and machines, and our technicians have really been superheroes in getting everything up and running in a couple of weeks. Due to this, I had to be flexible and rapidly adjust my curriculum plans. On the upside, it has given me precious time to investigate coding, both plugged and unplugged, with my students.
Unplugged: Coding using Grids
Thanks to some amazing folks on Twitter, I came across some great unplugged resources. I was participarly inspired by what teachers were doing with BeeBots. I don't have access to BeeBots, but, I do have access to masking tape and a floor!
Using a handful of small, wheeled toys that I picked up at a local shop, I began to lead all of my students through a week of Unplugged content. Some of my students remembered the word algorithm from the sandwich robot activity that we had done previously. We talked about this unplugged coding being like a puzzle that they had to use rules to solve in order to achieve specific goals - like reaching a square marked as the school.
I led each class through some puzzles together, where they all took turns to move our car through the obstacles I had set out. I witnessed unbelievable patience from students as they waited to try out their code. We all wrote out our code on whiteboards, which was invaluable as I began to teach them about debugging their code and fixing mistakes they notice along the way.
Unplugged: Coding using Grids
Thanks to some amazing folks on Twitter, I came across some great unplugged resources. I was participarly inspired by what teachers were doing with BeeBots. I don't have access to BeeBots, but, I do have access to masking tape and a floor!
| My grids were rudimentary but they were a big hit. |
Using a handful of small, wheeled toys that I picked up at a local shop, I began to lead all of my students through a week of Unplugged content. Some of my students remembered the word algorithm from the sandwich robot activity that we had done previously. We talked about this unplugged coding being like a puzzle that they had to use rules to solve in order to achieve specific goals - like reaching a square marked as the school.
I led each class through some puzzles together, where they all took turns to move our car through the obstacles I had set out. I witnessed unbelievable patience from students as they waited to try out their code. We all wrote out our code on whiteboards, which was invaluable as I began to teach them about debugging their code and fixing mistakes they notice along the way.
Unplugged coding was not only embraced by the younger students. My oldest students loved it just as much. I was able to let them split off into smaller groups to debate how they were going to solve the puzzles. Some groups were even able to create challenges for each other to navigate through and race to see who could finish a puzzle in the least number of moves.
Many groups didn't want to stop at the end of the lesson and asked me to take photos of their coding grid so that they could carry on next time. One Grade 3 group wanted to continue playing into break! It was so refreshing to see these digital natives enjoy such an analogue concept. There were no screens, just cars and whiteboards and a set of rules.
The students gained a solid understanding of what algorithms were, and how coding could be used to solve problems and puzzles. All of my students could create and debug simple programs using what we dubbed 'arrow code' on their whiteboards and some understood that shorter code was more efficient. For me, this unplugged week was the perfect introduction to coding using apps.
Saturday, May 20, 2017
Digital Leaders: The Green Screen
![]() |
| First steps onto the green screen. |
Our first outing was to our Learning Commons, where Mr Kirk has painted an entire wall green to facilitate and encourage green screen experimentation. Our Junior Primary iPads have the Do Ink Green Screen app installed. We talked about green screens and why they could be useful. I helped my students find the app and open up the great in-app tutorial video. I especially appreciated that the tutorial was led by a child as it helped my students feel that they could master this tool. I gave them no other instructions except to "figure out how to get this working".
The next 30 minutes were exciting and very noisy indeed. My students embraced the challenge I had given them and did, in fact, manage to get the layers working correctly to produce the green screen effect. They used images on the camera roll as background layers. Here are some of the results of our experiment:
I asked our Digital Leaders if they thought we could use the green screen in our IT lessons and it was a resounding yes. Here are some of the ideas they came up with:
- Making action movies with special effects
- Doing weather reports or news reports
- Telling a story in a different place
- A teleportation story
- Gr 2: Underwater facts but actually be underwater
Wednesday, May 17, 2017
Bubbles the Fish: Labelling skills on Google Slides
I want to tell you about a great lesson that I did today!
Last year we hadn't yet moved to GAFE. This was the lesson I did last May:
I knew that this lesson needed spicing up for this year. I wanted to teach students how to label an image but wanted to make it feel more enjoyable and less cookie-cutter. Google Slides made this possible.
Once they had chosen our fish, they then had to start working on our labels. As they all had different background images, they had to change their font and arrow colours to be seen clearly. This lesson was a great learning experience as working with the arrow tool can be fiddly at times. My students took great pride in making their piece of work unique and are looking forward to printing them to show their class teachers.
| Something is fishy... |
Last year we hadn't yet moved to GAFE. This was the lesson I did last May:
- Use Microsoft Powerpoint to label an elephant.
- Teacher chooses elephant picture and demonstrates the labelling tool.
- Students label the elephant and print
![]() |
| 2016: Not terrible, but all the finished pieces of work were exactly the same. |
I knew that this lesson needed spicing up for this year. I wanted to teach students how to label an image but wanted to make it feel more enjoyable and less cookie-cutter. Google Slides made this possible.
Labelling on Google Slides!
I learned a fun new trick at the EdTechTeam Summit: On Google Slides, you can add a background image to a slide. The background image cannot be moved or manipulated once added, which is ideal for my age group. This way they can add to an image without accidentally changing or deleting it.![]() |
| You can use the background button or right click on the slide to change background. |
I chose to add a picture of an empty fishtank into the background and acted surprised when we opened it. Where was Bubbles the Fish? My students were surprised by this turn of events and so I suggested we try and find a replacement fish using the built-in Google image search. By allowing them to choose the fish that we labelled, I gave my students agency and control over their own work. It also allowed me to teach them two brand new skills instead of just one! Bonus!
| Students had great fun selecting their own fish from the built-in Google search. |
Once they had chosen our fish, they then had to start working on our labels. As they all had different background images, they had to change their font and arrow colours to be seen clearly. This lesson was a great learning experience as working with the arrow tool can be fiddly at times. My students took great pride in making their piece of work unique and are looking forward to printing them to show their class teachers.
Sunday, April 23, 2017
Waiting on the World to Change - Overcoming Negativity
After hitting up the CT EdTechTeam Summit and meeting all of the fantastic educators out there, I have begun to analyse my own practice a bit more. My first reaction when faced with all the cool stories about what others were doing in their schools was a bit negative, to be honest. I was thinking things like:
Those negative thoughts that I was having were all excuses not to make change! I was using the things I couldn't change as reason to give up entirely on my new ideas. Just because I can't change the culture of an entire school doesn't mean I should stop innovating in my own room. I was thinking in that way because I was afraid - to try something new, to stand out, to be brave.
There are so many things I want to try this term. Here are some that I am investigating:
There's an earworm-y song I'm sure you've heard called Waiting on the World to Change. There's a great line in it that is applicable to what I'm going through at the moment:
"It's hard to beat the system, when we're standing at a distance" - John Mayer, Waiting on the World to Change
- There's no space in my timetable for that activity
- My teachers won't be supportive of that plan
- I don't know enough about that exciting topic to teach it
- I've tried to change that but nobody will help me
- I don't have the resources to do that
- I'm scared to try that in case I fail
It was all so negative! I didn't want to let myself fall into a negative spiral, especially after being exposed to new ideas and energy at the Summit. Negative thinking can really drag you down. When I started school last week, I let myself take a good long look at how my lessons were going. Some lessons, mostly the ones where I was brave enough to try something new, were great. Others, where I was clinging to old activities and routines because of convenience and the fear factor, were not so great.
Those negative thoughts that I was having were all excuses not to make change! I was using the things I couldn't change as reason to give up entirely on my new ideas. Just because I can't change the culture of an entire school doesn't mean I should stop innovating in my own room. I was thinking in that way because I was afraid - to try something new, to stand out, to be brave.
There are so many things I want to try this term. Here are some that I am investigating:
- Rebooting digital citizenship with Common Sense Media's resources
- Starting up a Digital Leaders club with my Grade 2s and 3s
- Bring in pre-coding and coding from Grade 00 upwards
- Using Seesaw to introduce journaling to my students and teachers
There's an earworm-y song I'm sure you've heard called Waiting on the World to Change. There's a great line in it that is applicable to what I'm going through at the moment:
"It's hard to beat the system, when we're standing at a distance" - John Mayer, Waiting on the World to Change
When faced with aversity, it's the easy route to kick back and decide not to try and make change happen. I see this happen with my colleagues. It can feel like roadblocks are put up no matter which route you take and your ideas are blocked at every turn. Regarding other projects, I've heard:
- That won't work, we've tried it before
- It's not in the budget
- I don't have time to do that
- That's not how we do things here
- Maybe that can happen at X school, but not at our school
- Our staff won't buy into that
- Tell me more about this idea
- What would the first step be?
- What would the benefits be?
- Can you help me understand X?
- Why do you think this method is better?
- How can we make that work in our context?
![]() |
| On my way to making change happen. |
Sunday, April 09, 2017
Sharing our Stories: Finding your People
I'm going to steal my opening of this blog from the amazing Keynote speech I was lucky enough to attend on Wednesday:
Once upon a time there was a little girl called Monique.
This opening is important, because my theme today is about sharing our stories. It gets a little personal in this post today, ladies and gents.
The theme of storytelling resonated through Lindsay Wesner's Keynote at the EdTechTeam Cape Town summit. She told us to be brave, even if we didn't feel like were brave. She shared her own story and the stories told by her students. She encouraged us to share our teaching journeys on social media and to prove to other educators that great, revolutionary education could be possible here in South Africa.
After the summit was over, I was at a braai (barbeque for non SAians) with some other teachers who had also attended. My friend, Barbara, and I were wrapping our heads around the idea of sharing our stories - we wanted to find a platform for local teachers to do that. Earlier that day, Barbara had presented a session on using G Suite for Primary Maths and we had been in a conversation with the people attending, sharing hashtags like #gafe4littles and #primaryrocks where they could find more activities like the one Barbara had been demonstrating. We were giving them direct links to social media in order to connect and engage with other educators.
Then it hit me. We needed a hashtag. South African teachers needed a hashtag to rally around, to have a place to share their story and to promote good, local practice. After the braai I did some searching and found out two things:
1) #SAedu was already used, albeit infrequently, by South Austrailian educators
2) I also found out that back in my early, experimental days of Twitter I had started a list of SA teachers on Twitter. It was called ZA Edu. I checked the hashtag and found that #ZAedu was essentially unused.
And so #ZAedu was born.
I will be the first one to admit that Twitter didn't grab me in the beginning. I remember saying that Tweeting felt like standing on a box and shouting at a room of people who were having their own conversations. Sometimes it still feels a bit like that to me. In terms of building up a PLN (personal learning network), though, it is absolutely invaluable. The brevity of Twitter, which frustrates me, means that you have to be succinct to get your idea across. Over time I have come to see the value of Twitter more and more, as it allows instant connection with your peers. That is the magical part.
I never really enjoyed school as a child. I found it difficult to connect with other children. My mum kept me going with my very own mantra, that one day I would go to university and then I would find my people. I was the first person in my family to go to university, and I did indeed find my people. Through finding those peers, those people who thought and strived for the same things I did, I also found myself.
The same thing happened to me this week when I attended the Cape Town summit. Even though I was nervous and had to be brave every time I spoke to someone, I felt at home. My crazy ideas were not crazy! Instead of looking at me blankly, they validated my opinion, or, even better, asked a question. I had found my people. Twitter and social media is an irreplaceable way for us to find our people online, too, and hashtags are a great way to filter through the spaghetti tangle that is the internet.
And so Monique found her people.
Once upon a time there was a little girl called Monique.
This opening is important, because my theme today is about sharing our stories. It gets a little personal in this post today, ladies and gents.
The theme of storytelling resonated through Lindsay Wesner's Keynote at the EdTechTeam Cape Town summit. She told us to be brave, even if we didn't feel like were brave. She shared her own story and the stories told by her students. She encouraged us to share our teaching journeys on social media and to prove to other educators that great, revolutionary education could be possible here in South Africa.
| Lindsay rocking the main stage at the EdTechTeam CT Summit. |
After the summit was over, I was at a braai (barbeque for non SAians) with some other teachers who had also attended. My friend, Barbara, and I were wrapping our heads around the idea of sharing our stories - we wanted to find a platform for local teachers to do that. Earlier that day, Barbara had presented a session on using G Suite for Primary Maths and we had been in a conversation with the people attending, sharing hashtags like #gafe4littles and #primaryrocks where they could find more activities like the one Barbara had been demonstrating. We were giving them direct links to social media in order to connect and engage with other educators.
Then it hit me. We needed a hashtag. South African teachers needed a hashtag to rally around, to have a place to share their story and to promote good, local practice. After the braai I did some searching and found out two things:
1) #SAedu was already used, albeit infrequently, by South Austrailian educators
2) I also found out that back in my early, experimental days of Twitter I had started a list of SA teachers on Twitter. It was called ZA Edu. I checked the hashtag and found that #ZAedu was essentially unused.
And so #ZAedu was born.
![]() |
I will be the first one to admit that Twitter didn't grab me in the beginning. I remember saying that Tweeting felt like standing on a box and shouting at a room of people who were having their own conversations. Sometimes it still feels a bit like that to me. In terms of building up a PLN (personal learning network), though, it is absolutely invaluable. The brevity of Twitter, which frustrates me, means that you have to be succinct to get your idea across. Over time I have come to see the value of Twitter more and more, as it allows instant connection with your peers. That is the magical part.
I never really enjoyed school as a child. I found it difficult to connect with other children. My mum kept me going with my very own mantra, that one day I would go to university and then I would find my people. I was the first person in my family to go to university, and I did indeed find my people. Through finding those peers, those people who thought and strived for the same things I did, I also found myself.
The same thing happened to me this week when I attended the Cape Town summit. Even though I was nervous and had to be brave every time I spoke to someone, I felt at home. My crazy ideas were not crazy! Instead of looking at me blankly, they validated my opinion, or, even better, asked a question. I had found my people. Twitter and social media is an irreplaceable way for us to find our people online, too, and hashtags are a great way to filter through the spaghetti tangle that is the internet.
And so Monique found her people.
![]() |
| My crumpled, well-worn lanyard. |
I hope that we can use #ZAedu as a digital space to share authentic, enthusiastic teaching in South Africa. I know that is happening in other classrooms because I had the privilege to attend the summit. Not all of our SA teachers can go to a summit, so this can be our way of connecting. I want to see what is happening in SA classrooms on that hashtag. I want you to share your bright ideas and madcap methods. Show me the amazing work that your students and colleagues are doing. Sharing these moments with other educators will give them inspiration to be that force of change in their own environments. As a wise woman once said, we are those that can shape the narrative of education in South Africa.
Subscribe to:
Posts (Atom)
-
Over the last term holidays, we were unlucky enough to have lightning strike near to our school during a storm. We lost large portions of ou...
-
This blog post is part of a series of posts exploring the concept of using the Minetest game as a learning platform in a primary school...
-
Ahoy! Welcome to Pirate Cove! Digital Project-Based Learning in Grade 3 Background: Objective Pirate Cove was a 9 week projec...