Showing posts with label life in the lab. Show all posts

Friday, January 26, 2018

Computer Lab Displays 2018


Hello, internet denizens!

This is just a quick write-up of the new displays in the IT Lab for 2018. I wanted to get this posted before the start of the year has passed me by, as I've had a great reception from staff and students on how the lab looks.

On the door:


This new poster is on the lab door. It helps new parents and students figure out what my lab is: the glass on the door is darkened so it's not easy to peer in and figure it out. I've since added a timetable for the lab as the venue is nearly fully booked already.

Awesome Algorithms, Brilliant BeeBots:


This display features the great free BeeBot instruction cards from TES. I printed the BlueBot over 4 A3s, I've never printed anything at such a scale but it turned out great. The directions also have helped as a reference for students when we work with the BeeBots.

For the first time ever, we are running an experimental extra-mural technology option for Gr 2 and Gr 3. This term we are working exclusively with BeeBots in our new Tech Club time so this board has been referred to often. My students like to use it to show their parents what we have been up to.

STEAM Showcase:


This board looks a bit bare now but the idea is that I will fill the STEAM Showcase with examples of great work. As we work mostly digitally, I didn't have a place to display student work last year. I think this board will help motivate my students when they see examples from their peers being displayed. I used the super, free, STEAM Monster posters on Teachers Pay Teachers.

The Biggest Change to the Lab:

Just before school closed at the end of last year I had asked for wires to be installed in the lab. The idea for these wires originally was to display student work but, after racking my brains the whole holiday, I finally had a better idea.


Right before school opened this term, I had a very diligent student helper who helped me punch holes into about 80 old CDs and DVDs that I sourced from my colleague. We strung these CDs onto colourful yarn and then hung them up all across the lab.


The change has been quite striking and it's charming to see the CDs dancing in the breeze. The new decor has also spurred some conversations with students about why we use CDs for (data storage), why we are using CDs for decoration (becoming obselete) and what we use now instead of CDs (cloud, flash/usb sticks). The older visitors to the lab have been having fun reading the titles of the motley collection of CDs, there are a few old games CDs tucked away in the corners of the room.


The pictures don't quite do it justice, they are quite animated little decorations - especially when the air-conditioning is on!

Sunday, September 04, 2016

Learning with Minetest Part 2: Activities and Aims


This blog post is part of a series of posts exploring the concept of using the Minetest game as a learning platform in a primary school. Click below to access the other posts:

Learning with Minetest Part 1: Rolling out Minetest in Pre-Primary
Learning with Minetest Part 2: Activities and Aims
Learning with Minetest Part 3: Impact on the Students

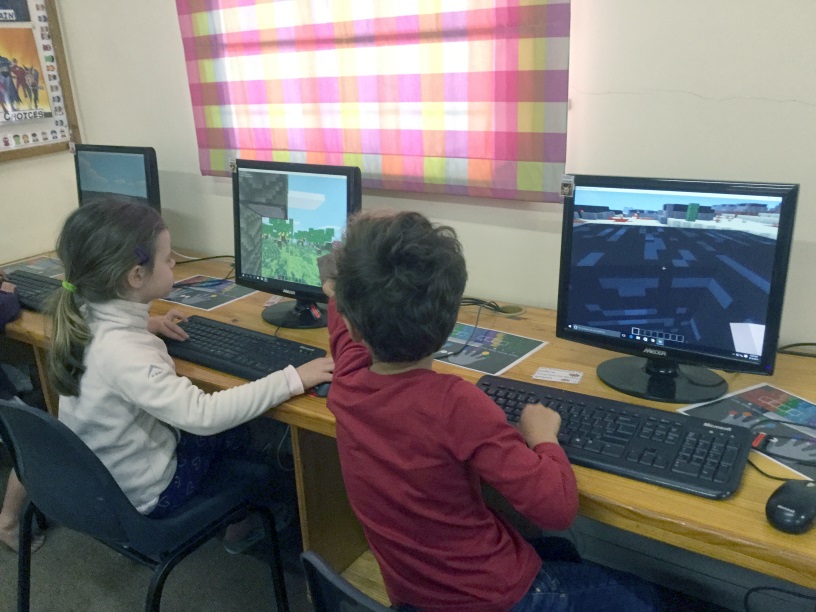
It's been 3 weeks since I set up Minetest in the computer lab at school. I wrote more about the installation in my previous blog post here. In this post I want to discuss the various activities that I organised, the worlds that I hosted and what aims I gave my students.

Rules

Before we started, each class and I formulated rules about our Minetest experience. It was important to spend the time having conversations about appropriate and inappropriate behaviour, and for the guidelines to come from the players themselves. This all helped to facilitate student buy-in to the rules agreement. All of my classes settled on something similar to the following:

Genuine IT Teacher handwriting, folks.
Use your real name was a rule that I added, we had a great discussion was had about nicknames and personal information but since I do already know their names as their teacher this was for practicality more than anything else. If someone broke the rules, they were not allowed to play any more of Minetest that session. Most classes brought up the idea of accidents. We discussed about how something was accidental or on purpose, and what to do if you accidentally broke a rule.

The Training Centre

All of my students aged 5 - 9 started off Minetest life in a custom-built obstacle course which I called the Training Centre. Taking ideas from what I've seen of the MinecraftEdu tutorial online, the students had to follow the blue line through tutorials on movement and interacting with the world. Signs were littered everywhere so that students who wanted more information could read them as they went along. About a third of my students were able to race through the training in record speeds, as they were avid Minecraft players. For the rest, the Training Centre was a valuable slow transition that gave them time to get used to moving with the mouse and keyboard at the same time.  Out of all my +/- 190 students, only 2 or 3 struggled with the controls by the end of the first session. All students were able to complete the training course within half an hour, with most kids finishing well before that. The Training Centre world was just a randomly generated world, and outside the structure that I built the students were free to explore the world proper.

An area of the Training Centre.
Building in the Desert

For my Grade 1 students, their next lesson started in the middle of a desert. I had built a blue rectangular path around the area for guidance and as a landmark. The aim of the lesson was to build structures primarily using sand. The students already knew about the unusual property of a sand block, that it will fall down without another block underneath it. We talked about strategies to solve this problem. Many students took it upon themselves to explore further and find other blocks to decorate their structures with. What was important about this session was that with each class I was able to have a discussion about appropriate online behaviour in a shared space, which I will talk more about later in the next post. Each group of children managed their task in a different way, and it was fascinating to see how some formed group structures and some built their structure away from the shared area.

Top: before students. Below: Three different classes, three different creations.
Building in Groups

With my Grade 3 students, I flattened a rectangular area in the middle of a forest. I split this area up into 4 numbered areas and split my students into small teams. As they had recently started with the concept of perimeter in their classrooms, on the suggestion of their classroom teachers I worked it into the lesson. Each team had to work together to build a structure on their area of land, and I gave them a basic perimeter guide for it - with one class, for example, I said their structure had to be 6x6. We talked about how we could check our measurements, whether the 6x6 would look rectangular or square and so on.

I prepped this grade for the group work, I gave each group 5 minutes of planning time off of the computers (in the 'real world') to discuss how they were going to tackle the challenge. I pointed out that everyone on the team would have different skill levels and it was up to the stronger players to help the new players with the job. Quite a few students got hung up on the idea of digging down to get better resources so I nudged them in the direction of building with dirt and wood then upgrading their structures when they were finished.

Arial view of the 4 build areas and the variety of structures.
The speed of their builds was impressive. Even though these were young children, they strategised their plans and built up their areas rapidly. Each group tackled the challenge in a different way. I loved the communication that I could hear within the groups: asking permission, suggesting plans and ideas, asking for help. Each team built a very different structure and when the time came to an end every class wanted me to keep their world safe so that they could continue building another time. Some classroom teachers suggested we keep Minetest installed as a reward activity which I think is a great idea given the high motivation of the students.

Team 2 used a variety of materials to build their gravity-defying house.
My students simply didn't want to stop playing Minetest. A number of them have asked how to get the game at home, even though they already play Minecraft. They are enthusiastic about the idea of using Minetest in a class to complete a common goal, and get deflated when I explain that our Minetest game can only be run locally, in the computer lab. Their next question is when the next time to play Minetest will be!

In the next post, I will be discussing the impact of using Minetest in the lab. I noticed many different areas of learning that I hadn't even anticipated so I'm looking forward to sharing those with you.

Next - Learning with Minetest Part 3: Impact on the Students
Previous - Learning with Minetest Part 1: Rolling out Minetest in Pre-Primary

Friday, August 19, 2016

Learning with Minetest Part 1: Rolling out Minetest in Pre-Primary


This blog post is part of a series of posts exploring the concept of using the Minetest game as a learning platform in a primary school. Click below to access the other posts:

Learning with Minetest Part 1: Rolling out Minetest in Pre-Primary
Learning with Minetest Part 2: Activities and Aims
Learning with Minetest Part 3: Impact on the Students

As a person who is an educator and has also played Minecraft, it's been obvious to me that the idea of mixing the two concepts together would be hugely successful. A 3D world focused on building is a very suitable game-space to develop many areas of learning. The creation of MinecraftEDU, which has recently been bought and re-released by Microsoft/Mojang, seemed inevitable. The US dollar price-tag for MinecraftEDU wasn't ideal, though I have always been interested in the possibility of bringing Minecraft into my computer lab.

Last week, I stumbled across Minetest. Minetest is a free, open source game which takes it's inspiration heavily from Minecraft. Minecraft itself was first inspired by a game called Infiniminer, we are the sum of our influences, etc. Nobody involved with Minetest makes a profit, the entire game framework is designed so that anyone can create mods for the game and the community shares the development. I wrote a proposal for my school administration which outlines the differences between the two games, which is available here.

Minecraft versus Minetest

In brief, when I brought Minecraft in to test in the lab it behaved sluggishly. The IT technicians had been concerned about setting it up on LAN as they had run into issues before. Modding Minecraft was a tricky thing as it had never been designed for modding. As I mentioned, the fact that it was a paid product also put a damper on the possibility of using it for learning.

Minetest was surprisingly easily for me to set up, in comparison. Even though there is less documentation out there for Minetest (they do have a wiki), I managed to get a server running in very little time at all. The student computers have the IP address saved so that when the server is running on my teacher station they can just enter their username and press Connect. Minetest performs incredibly smoothly, especially compared to Minecraft. A few days after finding it, I still marvel when I open up a world and there's so little lag.

Day 0 - Setting Up

After installing Minetest on a couple of machines to test the local server idea, I invited a dozen kids in to see how the concept would work. It was an after-school hour of utter joy, for them and for me. I was soon shown how much I need to learn about how hosting a server works, but it was also immediately clear how much potential Minetest could have. Something that proved crucial was modifying the config file so that the public lobby of servers was disabled for our students. I want them to only use Minetest locally, that way it is safer, we aren't bogged down by external mods, and they will be less distracted from the learning objectives. I learned how to do that here.

Day 1 - Grade R gets a sneak peek

Today I ran my first few classes through Minetest. I had wanted more time to prepare, but one of the Grade R teachers had mentioned that I had got 'Minecraft' working in the computer lab and the first class was beside itself with excitement. I decided to dive in with explaining how the W key was used for moving forwards, the spacebar for jumping, and the mouse for looking around. Many children had never used the keyboard and mouse in this way so it was a learning curve for them. As I hadn't thought to establish a strict ruleset to enforce digital citizenship, I used the golden rule of treating each other kindly. Next time I will definitely start with a rules and consequences discussion as I have seen on many Minecraft teaching blogs out there.

Helping our friend dig out a block.
The Grade R (age 5-6) children responded really well to the experiment. All of the children were soon able to navigate around the landscape, jump over obstacles and follow their friends around the map. Some children were comfortable with beginning to dig and place blocks, which will be the foundations of the building we will do later. All of the children wanted to play again, immediately asking me if we were going to play in their next lesson. This afternoon, a parent came to find me to tell me that her son had already explained about Minetest and how much fun he had in Computers today. It's always great to hear that my ideas are helping students become enthusiastic about their learning.

Exploring our desert world.
Next on the agenda is introducing Minetest to each of my classes, beginning each one with a discussion about the rules. I'm expecting something along the following lines:
  • Use your real name to log in.
  • Leave other people's buildings alone.
  • Treat each other kindly.
I will be using the huge realm of information that has been written for using Minecraft in an educational context, many of the lessons and guides can easily be applied to the Minetest environment even though it isn't as sophisticated. I also want to get my classroom teachers in for a Minetest lesson so that they can let go of their reservations about using such a popular game for learning. If we can harness the platforms that the children are naturally drawn to for the power of good, then I think we'll have done something great.

H finds a warthog.

In the next part of this series, I will be discussing how I went about setting up Minetest for my various classes. This includes the worlds that I used and the activities that I planned. Click below to access part 2:

Sunday, July 31, 2016

Display: Bits and Bytes

In the computer lab we are lucky to have a large, prominent display board. Sometimes it can be a challenge knowing what to put there, and I most recently had student work displayed. With the start of term 3 I decided to spruce things up a bit. This has been a display that I've been wanting to set up for a long time but I finally had all of the parts together to make it work. During the past year the IT technicians have been amazing at keeping outdated and broken bits of hardware aside for me. This is the result:

Bits and Bytes - hardware display
The first challenge was figuring out how to hang the keyboard. Luckily, there is a nail embedded in the wooden frame of the board, and after I wrapped the keyboard cable around it, it managed to hold the weight. The motherboard was also a tricky shape to hang, some of my colleagues suggested a 'picture-frame' arrangement which turned out great. The rest of the bits and bobs secured easily to the cork backing, mostly with drawing pins. 

Parts of the Computer
The display has already drawn curious eyes, especially thanks to the pop-out nature of all the physical pieces. The colourful yellow labels really livened up the place, too. I'm proud of the monitor that I'm created from a screenshot of a student's desktop and some recycled black-printed paper. 

What the display board looks like in the lab.
 I've left a bit of space to the right of the display, in case I'm able to track down a pair of worn-out speakers, earphones or headphones. I've had senior primary boys ask what some of the bits and pieces are. What's a floppy disc? I consider this display a great success.

Friday, September 11, 2015

The Pencil Cycle

I work in a computer lab. There is generally very little use for stationary, but I keep a pencil-holder type object on my desk. At the start of the year it was mostly filled by pens and perhaps a single pencil.
The pencil holder (the sides are magnetic).
During the course of this year, I have acquired a number of orphaned pencils. The sheer number of them is surprising, since rarely do children bring stationary in here. The only occasions are when I ask for it, which is not often, and when children do their homework in the lab in the afternoon. I tend to assume that if you are doing homework you would keep an eye on what stationary is yours and take it with you when you leave. This is not the case. We find pencils on the floor, under and behind desks, on the desks - everywhere. Whenever I find a pencil that has no name and has been enjoying life in the computer lab for a while, I add it to my pencil holder. Inevitably, the pencils end up being used by me or borrowed by a child - and then they disappear again. 

This pencil cycle has worked it's way into my expectations - I don't get concerned when all of the pencils disappear, because I know that eventually my stock will be replenished. The highest record for adopted pencils was 6 living in the pencil holder, at the moment we are on 3. A new addition was found on the floor this morning. I haven't had to buy a single pencil this year so far.

We do find the occasional eraser, but that is much rarer. There is a general catch-all lost property box that houses the miscellaneous items that are left here. I'm not a monster, if a stationary item has a name then we return it. The only other item that is left behind as much as pencils is homework diaries. The homework diaries are used by my young students to record their logins and passwords for our educational websites - they leave them behind often just out of sheer forgetfulness when being fetched by parents in a rush.