I have a range of ages and abilities that visit my computer lab every day. It's always a challenge to provide the kids with engaging content due to our limited bandwidth. There is a website that I've used more and more this year and I'd like to tell you about it. Recently I've been adding JigZone as one of the approved websites that my students are allowed to visit. JigZone is a puzzle website which has large, varied categories including themed sections such as animals or sport.
Many themed puzzles keep the idea fresh.
It's a great site because it loads relatively quickly and provides you with lots of options. The puzzles are available from 6 to 247 pieces. I use the 20 and 48 piece puzzles with my age 5 - 9 year old students. The kids become calm and focused when working on their puzzles, which is quite unusual for my computer lab! They often choose to work on puzzles in their free time and enjoy working on their own or in partners. I keep our school Symbaloo up to date with puzzles appropriate to their learning themes.
To keep things fresh, JigZone has a puzzle of the day and also a custom puzzle feature that I haven't tried out yet. Underneath the puzzle space is some statistics about how long you have taken compared to the average and the fastest time - I plan to introduce these to my students as they progress.
A screenshot of the puzzling interface on the JigZone website.
They have some ads on the puzzle page. The top ad is an unobtrusive banner but the bottom ad is a square video which autoplays and enlarges to a full-screen video advert when you mouse over it. For my young (and even older) students this is a huge temptation to play with. We constantly do talks about the purpose of advertising and remind our kids about our limited bandwidth, which means running a full-sized video ad is not the best idea.
Despite the adverts, JigZone offers a great puzzling experience for my students.
My school is a stone's throw from the little town of Franschhoek. This is a most exciting week, as the Franschhoek Literary Festival is happening. A lucky off-shoot of that is that we get very exciting literary guests during the Literary Festival. Each grade gets a different author or illustrator who comes and talks to them. This year, one of the guests who will be visiting our Grade 1 class is Korky Paul, the illustrator of the Winnie the Witch books. Winnie the Witch is very popular here at Bridge House School, so we are all very excited to meet Korky Paul.
In IT this week, the Grade 1s got into the spirit of things by helping Winnie the Witch unravel some Witchy Words. I created an MS Publisher template that, when opened, looked like this:
A mixed-up magical mess.
I've put a download link at the bottom of the post if you would like to download the free the template.
Winnie the Witch, I explained to the kids, had sent us a message. The problem was, though, that her magic has mixed-up the words and made them all witchy. Their job was to use MS Publisher to untangle her message.
The Grade 1s had to click-and-drag the words around so that the four sentences made sense. We talked about clues that could help us figure out the sentence structure, such as capital letters and punctuation. We also talked about making sure our sentences were neat and tidy and no words were floating off in page. We got more familiar with the complexity of clicking-and-dragging in Publisher, especially use of the undo arrow to fix any strange mistakes. The students enjoyed the activity and were proud to print their finished product.
Some Witchy Words proudly on display in the JP IT Lab.
Explaining what our objective was.
A close-up of two of our fantastic pieces of work.
Second term is upon us here at Bridge House School. For our coding club, we have moved onto the ambitious task of coding games in Scratch. As themes go, gaming is the theme that is the most motivating for my students. I have 9 excited youngsters who are all eager to recreate Minecraft - I've had to sadly put things in perspective for them and explained that it might take years (!) to be able to make something as good as Minecraft.
For now, we are starting off with an excellent racing game template from CS First. Even though I'm not running my coding club through the CS First website, their resources and templates are invaluable. So far, my students are working on the following:
Changing sprite costumes, using the built-in library
Creating their own sprites
Sprite movement using keyboard keys (forward movement as well as left / right turn)
Altering the stage backgrounds to create their own race tracks
Populating the track with decorative sprites who have text speech
A few groups have even figured out how to program keyboard keys to change backgrounds and racers between costumes. This is an enormous amount of learning in a couple of weeks. Next week I hope to tackle the exciting element of sound, if sprite 1 touches sprite 2 then a chosen sound will be played. The students are very excited about the idea of adding 'crash' sounds when a racer touches another. The finale will be to play each other's games - a true test of how 'good' their creation is.
As the race track has been set up to be a two-player game, I have asked them to try and work in pairs. This has been extremely effective - this age-group codes better in pairs because they are able to work on their problems out loud. They have a built-in person to discuss the code with and two sets of eyes to spot coding problems. The only slight downside is that we have an odd number in our club, so I have to encourage them to try out working as different pairs.
Once we get tired of the racing track idea we can try and move onto a maze game. All of the guides for these activities are included on CS First, so I highly recommend going through their material to see what interests you.
Our young coders get to grips with the race track using Scratch.
We have kick-started our way into the New Year here at Bridge House School. In Junior Primary we were lucky enough to be kitted out with a brand-new set of 26 lab computers, all upgraded to Windows 10. My students (as well as myself) have been tackling the new features with much enthusiasm.
The Grade 3s have been learning about sun safety. As we live in South Africa, it's summer right now and our sun can be extreme! We created Sun Tips posters using MS Publisher. This was done without a template, after our discussion about being safe in the sun I let them design their own posters.
These are proudly displayed in one of the Grade 3 classrooms.
Our Grade 2 students have started to delve into the world of reptiles. The acrostic exercise was my inspiration, despite how common they seem to be I've never used them in a lesson before. I laid out the R E P T I L E S on an MS Word page and had the students use their imagination to fill in the letter lines. I got the snazzy reptiles border from Sparklebox.
Reptile fact acrostics on display outside in the Grade 2 playground.
For Coding Club this year I have tentatively begun to use the desktop-installed version of Scratch. This term I have a boisterous group of 15 young coders. I'm pleased to report that 3 girls are included in that number, and are just as boisterous as the others. We are slowly learning what we can do in Scratch, the possibilities seem endless!
In the last lesson of 2015, my Grade 1 students were asked to write some advice for next year's Grade 1 kids. They took to this task with enthusiasm. We worked on capital letters, full stops, descriptive words and how to give advice. When they were finished they could adjust their font and text colours. It worked well as a reflexive exercise beyond the standard 'recapping on the year'. It makes me so proud to read over these and see how much their writing has improved in just one year! They are so ready for Grade 2.
A selection of advice from our 2015 Grade 1s.
I've been on my summer holidays, relaxing and gathering my thoughts for a new year of teaching IT. I'm looking forward to improving what I do. The most important thing that I think I can teach in the lab is problem solving - what to do when something goes wrong. If I can help the students develop intelligent guesses, they'll cope fine with any computer problem.
Friday was our Prep staff meeting and I was given a 25 minute slot to present the Digital Passport program. It was my first ever public presentation so I was quite nervous! All things considered, it went well. Our school is rolling out a 1:1 iPad scheme from Grade 4 up in 2016 and we needed to have a behaviour expectation guideline for the students to follow. We picked Digital Passport at the recommendation of Shaun Kirk, our Learning Commons director. It is a browser-based scheme with detailed lesson plans covering 5 modules: communication, privacy, cyber-bullying, searching and creative credit.
My very basic presentation slides are embedded below. Embedding this presentation was also a good learning opportunity for me, I haven't embedded anything into a blog like this before. We are living in the future, I tell you.
As we want our homeroom teachers to take charge of this program and run it with their classes, my presentation was aimed to ease any discomfort. One of the teachers told me afterwards that she appreciated the presentation because it made Digital Passport seem like something that she would be able to do. I'm glad that staff felt they can handle the Digital Passport scheme - it is straightforward and an excellent baseline to encourage discussion of the various topics.
A candid shot of me presenting taken by one of the audience members. Maybe you can't see how scared I was from here.
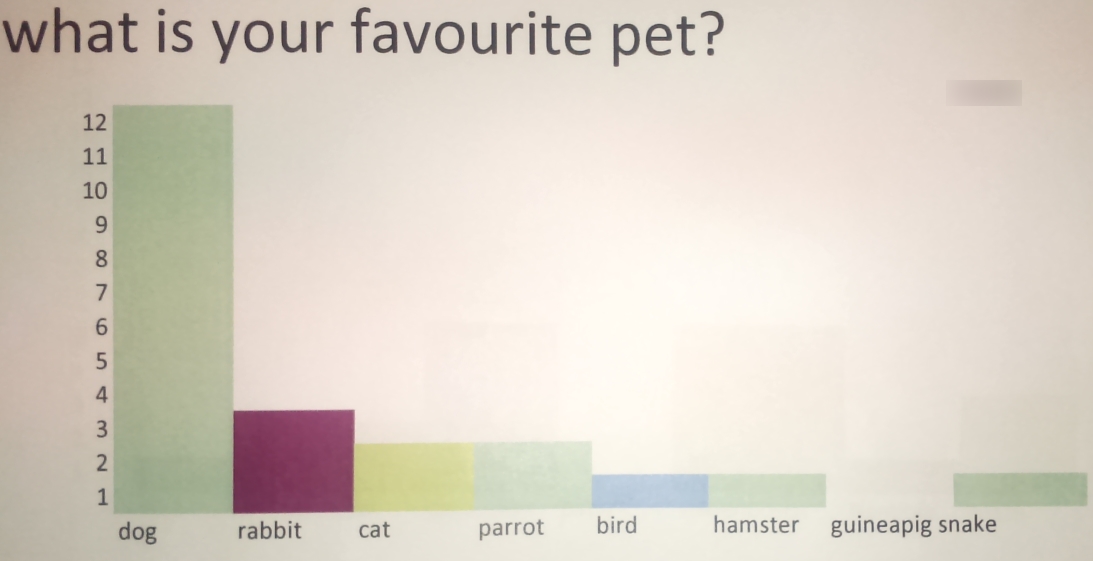
It's always a thrill to have printed work from IT lessons up on the classroom walls. The Grade 1 classroom teacher put up this neat little display of our Excel survey bar charts. I snapped a pic of it this week as I was going past.
What is your favourite?
For the charts, we asked the students to survey their classmates about a favourite something. This could be a favourite food, a favourite sport, favourite hobby, and so on. They wrote out their survey answers in any way that they wanted on paper, then brought their results to the computer lab. From there, I explained how to lay out a bar graph by manually shading in the cells. I believe building this bar chart from scratch rather than using the insert chart option is important so that the students gain the understanding that the shaded cells are representing a number. Here are a few more examples of the charts close up:
After this lesson, we have now gone on to learn about creating graphs using data in Excel. This survey, however, has been very important to get our students to understand the meaning of a graph - a picture that gives us information.