Monday, October 02, 2017

Pirate Cove Part 2: Digital Project-Based Learning in Minetest

This is post 2 of a two-part series on using Minetest to explore project-based learning with Grade 3 students. Click here to read Pirate Cove Part 1: Digital Project-Based Learning in Minetest.

Step 4: Check


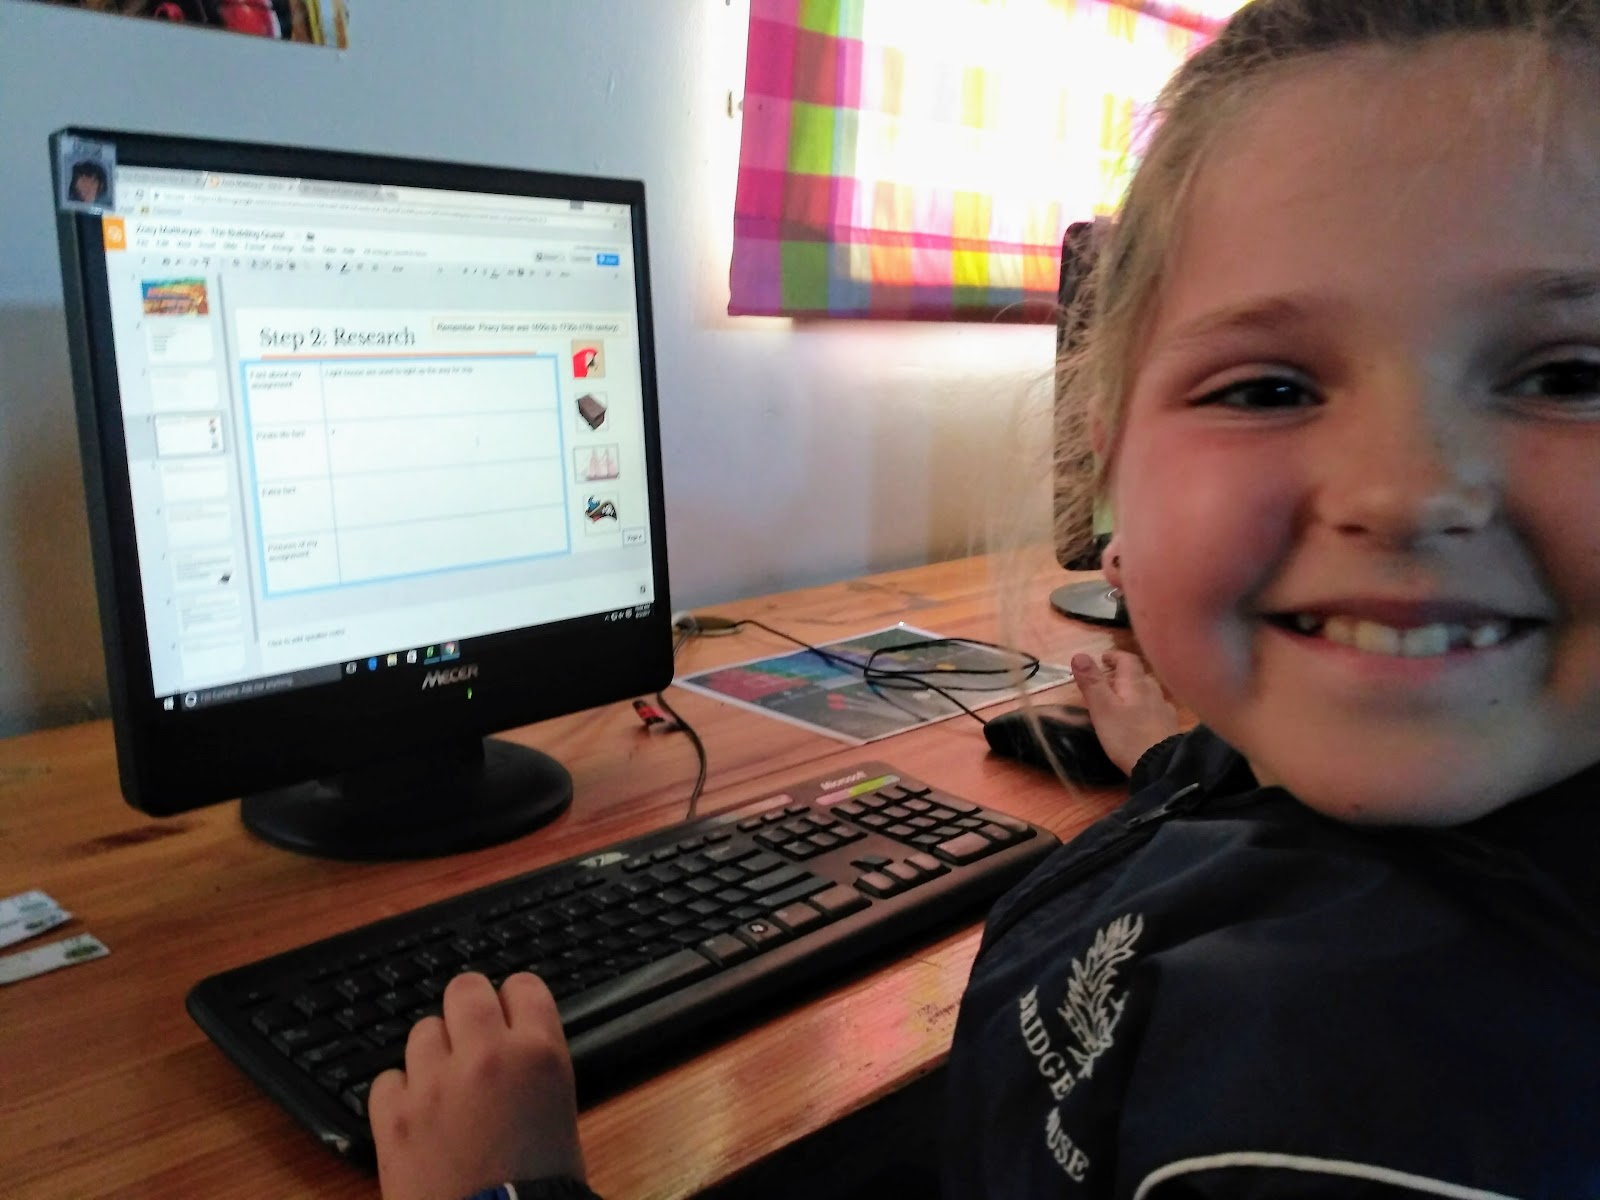
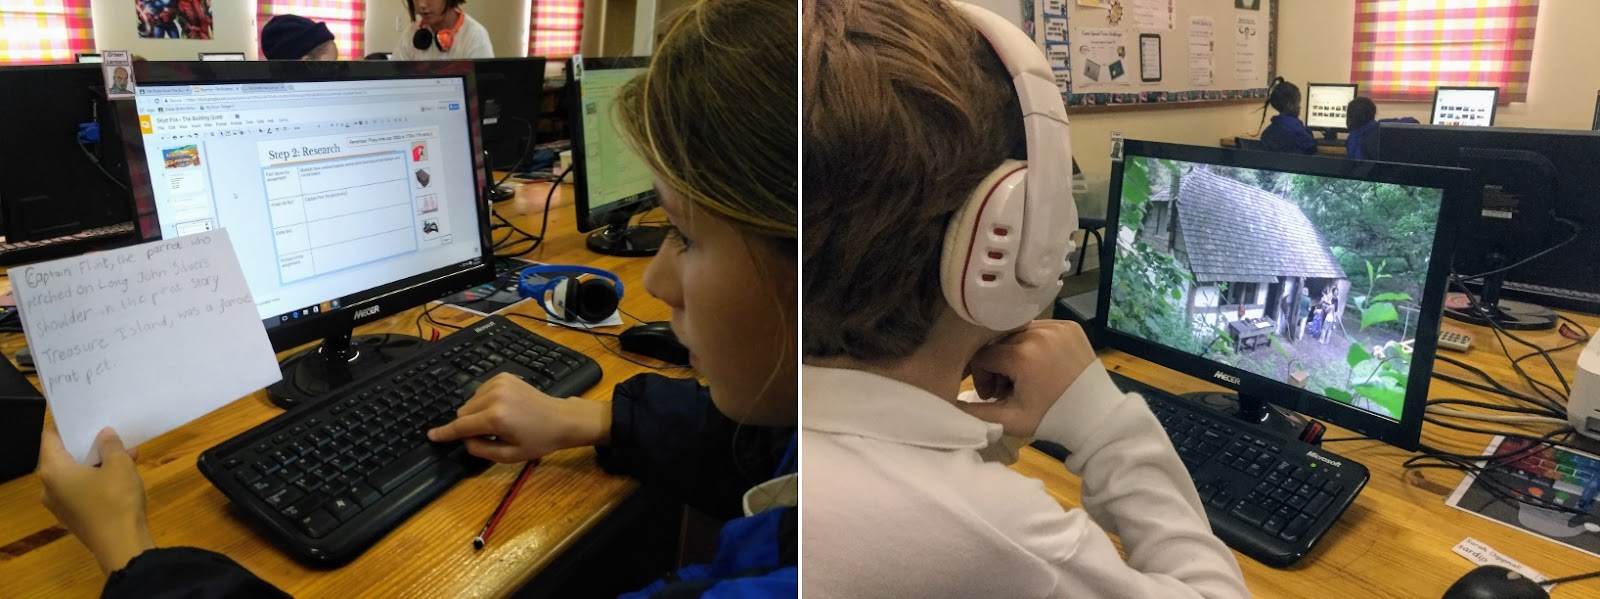
I included a checking step in the project: all of the 'paperwork' had to be done before the teams could earn building time in the game. This was an opportunity for all of the student teams to finish the research and design phases and help anybody in the class that needed extra help. I emphasised that our pirate town is a community and we all had to help each other. This mentality was later seen in the building phase as students asked to help other teams finish their buildings. Our lessons during this project were quite intense and busy for me and this built-in checking step helped me actually have a chance to look over their written work and ask students to adjust their work if needed.


checking.jpg

Step 5: Build!

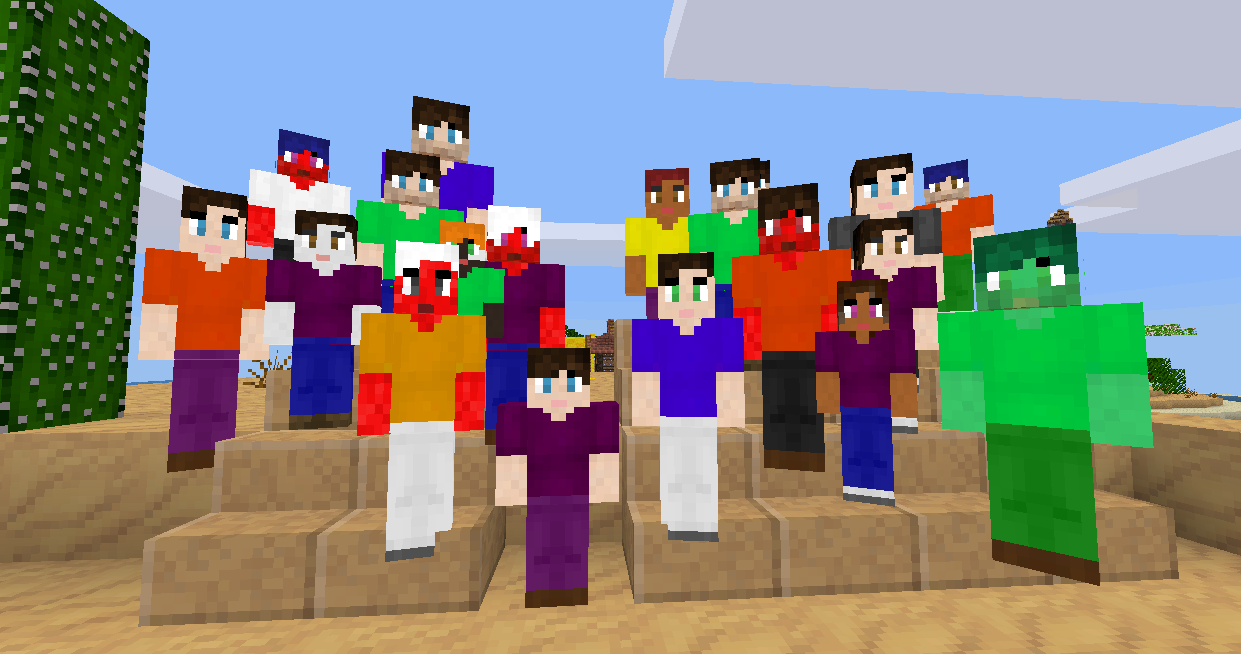
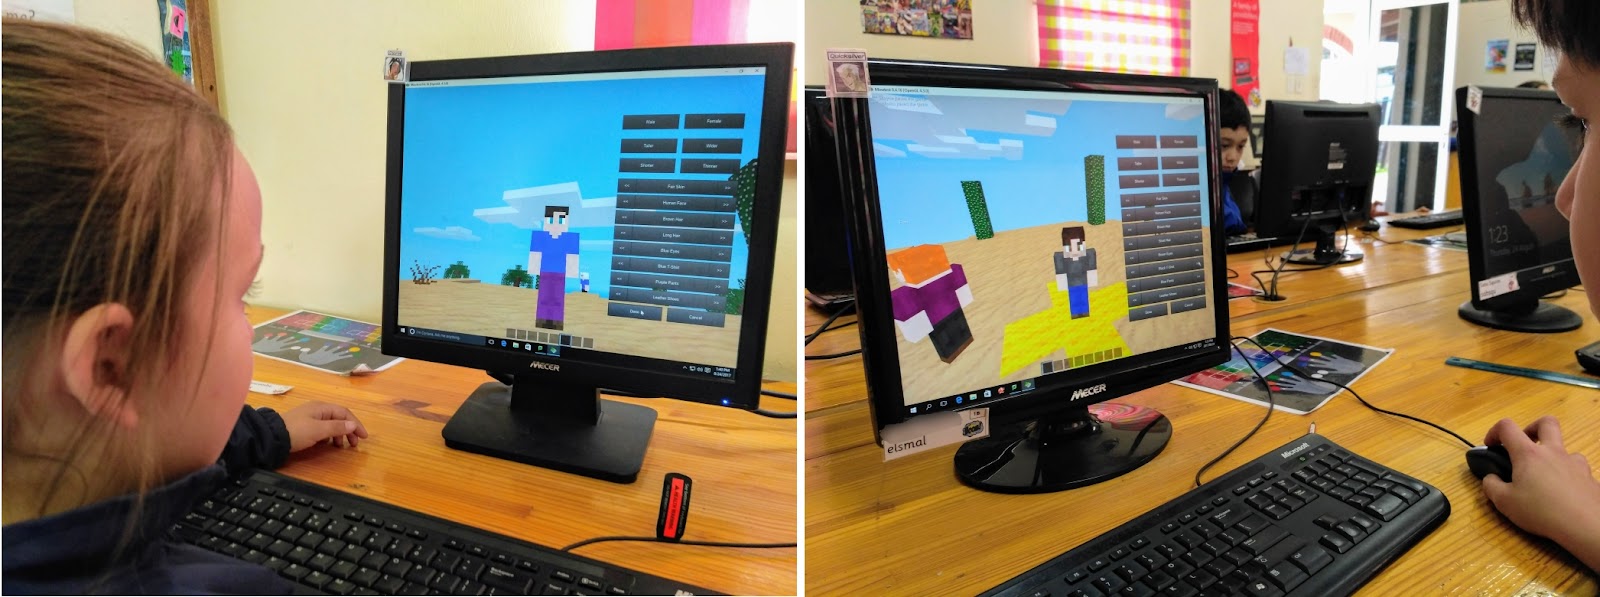
This was the highlight of the project for the students and the part that provided the motivation to complete all of the previous steps! The students logged in and we spent a chaotic first session getting used to the controls, the map we were building on and the plots that the teams were allocated. My students impressed me with their levels of cooperation, they really tried very hard to follow the rules of Parley and stay focused on their objectives. Despite a large range of skill levels, the students helped each other learn basic tips and tricks to make their building projects a success. I rewarded the most helpful pirate of the week with permission to wear a gold medallion which further helped to incentivise helpful behaviour.

The Minetest version we used allowed for the students to customise the appearance of their character, which was massively popular. This feature had the side effect of teaching the students about using Function keys on the keyboard (F7 changed camera perspective) and the importance of a correct username (if they logged in with a differently spelt username they lost their customisation).


chars.jpg

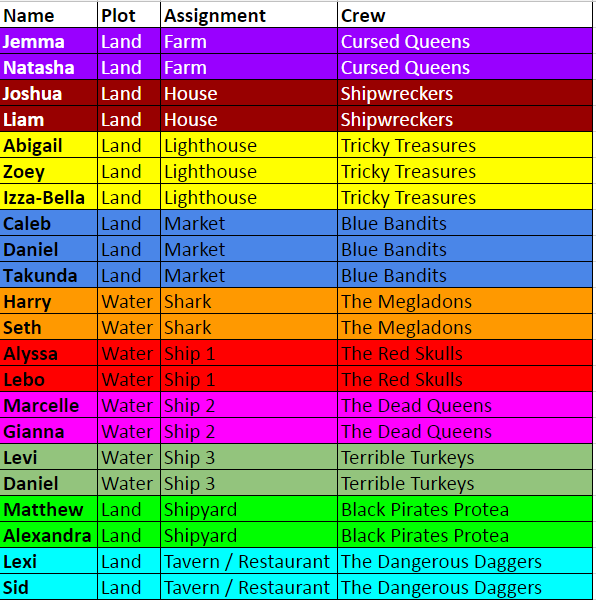
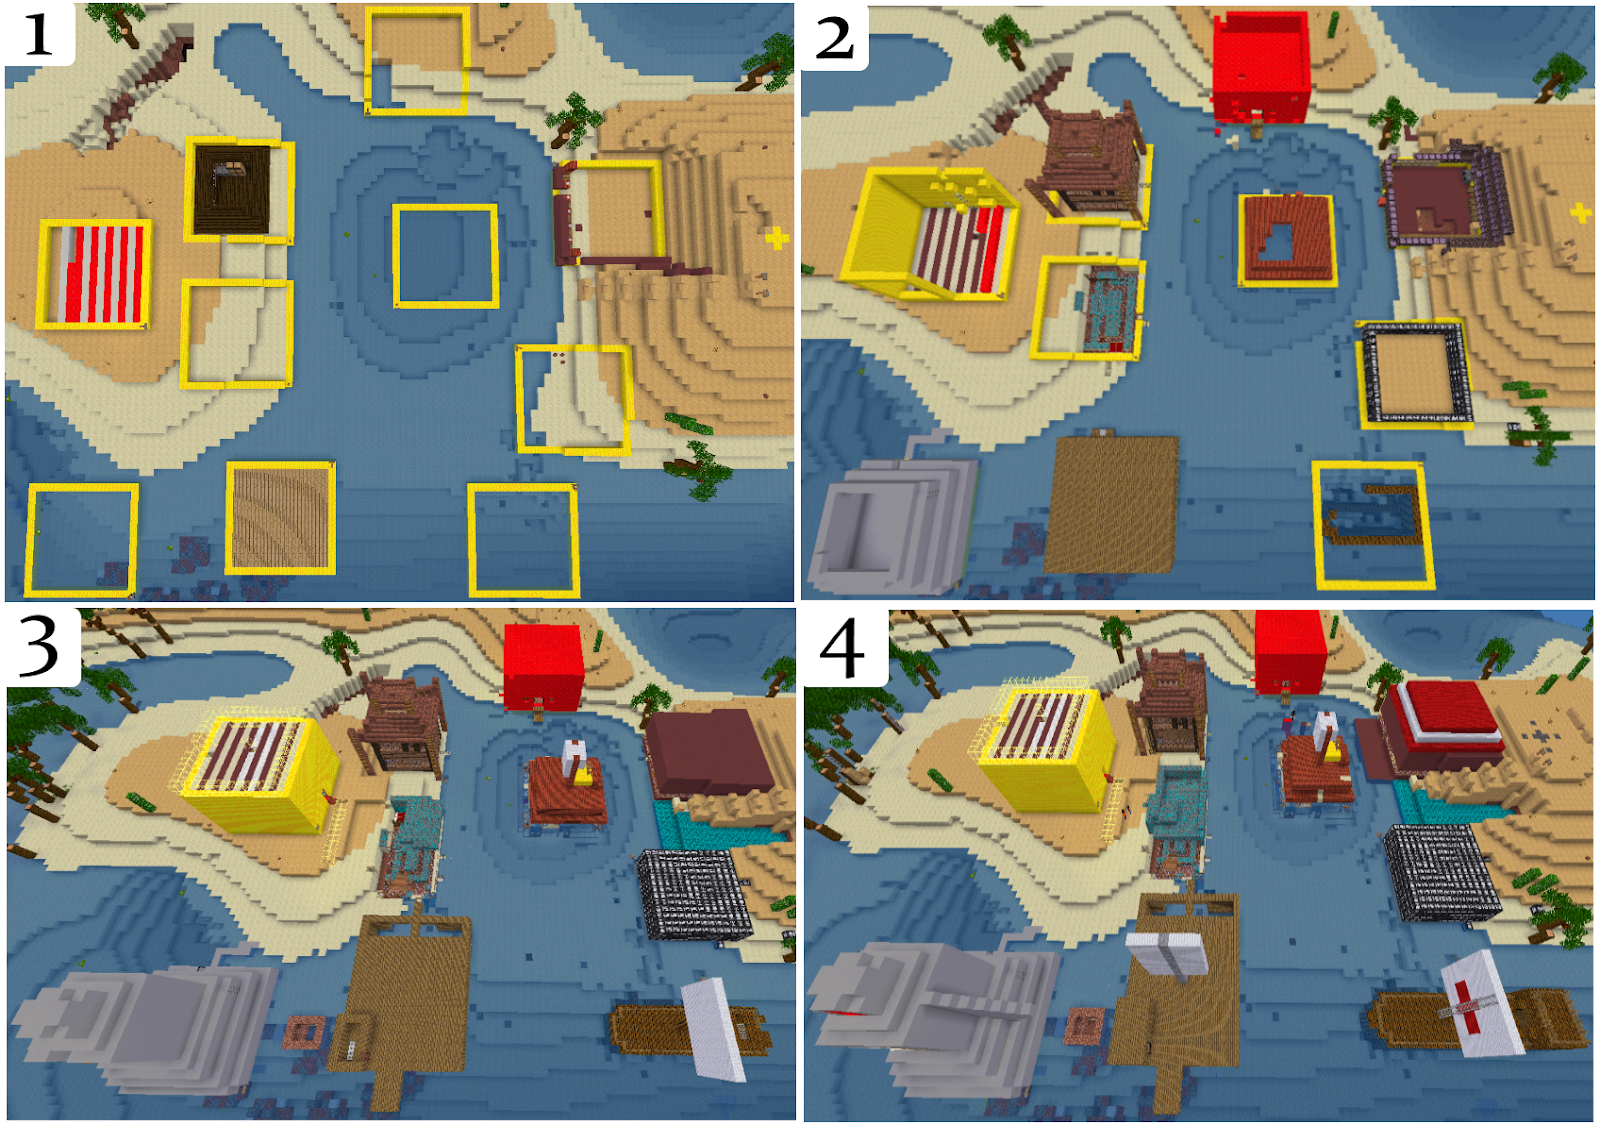
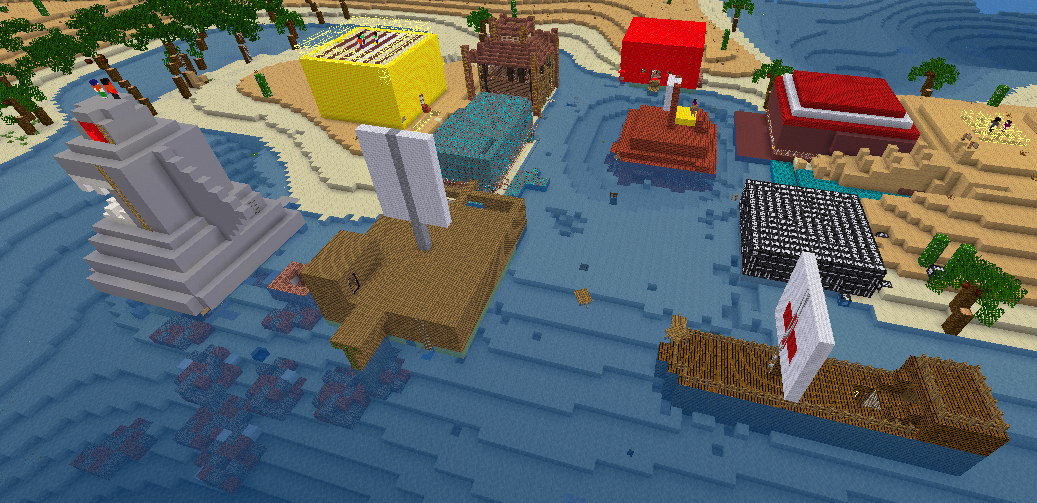
We constructed our pirate coves for a total of 4 hours = 1 hour per lesson. In that limited time both classes finished their assigned buildings and worked together to improve their towns. Students came up with original ideas to customise their town: one class worked on a large statue with a pirate hat and another class came up with the idea of creating a path to join up their buildings. Here a sample of one pirate cove being built up over the four lessons.


3H Timelapse.png


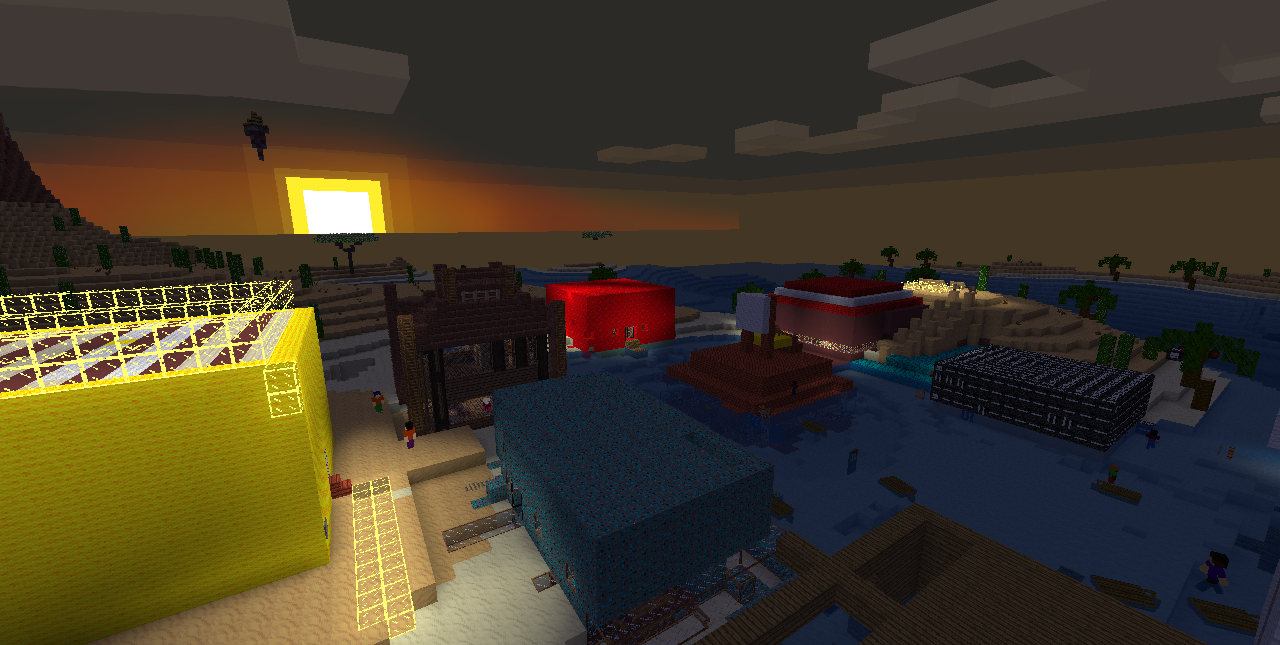
The final lesson was set aside for students to leave their plots and walk around the town, exploring what they had built together. At their request, I set the game time to night in order for us to see pirate cove lit up from the light of the lighthouses and other buildings. At the end of the lesson, I asked the students to park their character in a spot of their choosing as we turned the server off for the last time. Most of them chose either a beautiful viewpoint or inside the building they had made. One student gave this advice:


When the time comes to turn the server off forever, make sure you go somewhere with a good view.


Poignant!


Click here to view a slideshow of screenshots from our finished pirate cove project.


Step 6: Reflection


The students learned how to take a screenshot on a computer (print-screen key) and paste it into Microsoft Paint. After saving it, they imported the screenshot into their Building Quest document and completed a reflection page about the project. We then discussed advice we would give next year's students:


  • Don't jump into deep holes looking for shiny rocks, you will get stuck.
  • Work as a team and listen to your partner's ideas.
  • Keep your idea simple, don't let it get too complicated.
  • When you dig don't dig straight down, it's dark.
  • Ask people for help if you need it.
  • Don't sit in chairs, you will get stuck. (we had a few glitchy chairs)


I feel this is a refreshing mix of advice relevant to the game and also to wider contexts!


Step 7: Learning

Learning areas for this project included:


Digital literacy:
  • Online interactions and appropriate behaviour
  • Design process
  • Online research
  • Integrated studies: Pirates


ICT skills:
  • Software: Minetest
  • Software: Google Slides
  • Software: Microsoft Paint


Computational thinking approaches:
  • Collaboration
  • Persevering
  • Creating
  • Tinkering


The students and myself thoroughly enjoyed the experience of project-based learning in ICT this term. The maps for each pirate cove have been saved for posterity and future showcases.


Completed Building Quest Projects:


Pirate Cove Part 1: Digital Project-Based Learning in Minetest

Ahoy! Welcome to Pirate Cove!

Digital Project-Based Learning in Grade 3

Background: Objective


Pirate Cove was a 9 week project that I ran with two classes of Grade 3 students. Each week we had one hour of lesson time to work on our project. The Grade 3s had a term-long Pirates theme that stretched across all learning areas and I wanted our ICT lessons to integrate with that theme. I dedicated the entire term to the project as I wanted students to become invested in our final, collaborative product - a pirate town built in the computer game Minetest. Aside from learning how to play the game together and various ICT skills (screenshots, image manipulation and importing), I wanted my students to research, plan and design their building project and reflect on the process.

Background: Technical

Minetest was my chosen Minecraft clone because it was free and runs well on the computer lab Windows machines. It also runs locally which means that it didn't require any bandwidth or internet to run. Each student used a Windows desktop to access their project document (Building Quest) as well as build on Minetest. The students had briefly experimented with Minetest last year and some remembered it fondly, but this project was the first time any of them had spent longer than an hour with the game. I've written more about Minetest on my blog here.

crew.png

Step 1: The Building Crew

The first step for us was to determine what we were building. The first lesson was taken up with explaining the parameters of the project, our goals, and giving the students time to come up with ideas. They filled in this Google Form so I could gather data about how much experience they had in Minecraft/Minetest and what they wanted to build. I used their responses to build up a number of teams (building crews) in each class, roughly based around what the students requested. I also used this step to introduce our rules of Parley, which covered expected behaviour to work together and not cause any trouble.

The survey allowed me to gather data from the students and sort them into compatible teams. The students were sorted to balance out experience at this kind of game and type of building they wanted to work on. They chose the crew names themselves and became quite attached to their colours!

survey.png


Step 2: Research

The students were sorted into their teams and we rearranged the seating plan so that teams could sit next to each other. While this created a delay in the beginning with logging into new machines and profiles, in hindsight this was an excellent choice as it helped students work together with their partners. They started work on a structured research task to find out more about their building assignment. The students each worked in a Google Slides workbook (Building Quest) where they completed all of their 'paperwork' for the task. There are links to samples of completed workbooks at the end of this write-up.


Students used a bank of suggested websites as well as saved videos to learn more about their building assignment. They had to try and find out information about the types of materials that would have been used to build their assignment in real life during the 16-17th century. Each step of the project was clearly laid out and teams were able to move ahead with the next step as soon as they felt ready to. I was able to take certain teams aside to give them individual support to complete a task they needed more help with. This differentiated approach was a new experience in the ICT lab and the students appreciated being able to work at their own pace.

research.jpg

Step 3: Design

Once the research task was complete, students moved onto the design phase. They used Microsoft Paint, a new program for us, to sketch out a proposed design for their building. The students largely learned how to use Paint from each other. For the group of students that needed it, I ran a brief tutorial on the basics of the program. Afterwards, the students saved their design (giving the image file a good name!) and imported it into their Building Quest document. The next phase was to label their design to give it more detail, then complete a 5 sentence write-up of what their design would be made of.

I believe that including this design step helped the students become much more invested in the later process of building. I was blown away by the quality of their work!


This is post 1 of a two-part series on using Minetest to explore project-based learning with Grade 3 students. Click here to read Pirate Cove Part 2: Digital Project-Based Learning in Minetest.