Friday, August 19, 2016

Learning with Minetest Part 1: Rolling out Minetest in Pre-Primary


This blog post is part of a series of posts exploring the concept of using the Minetest game as a learning platform in a primary school. Click below to access the other posts:

Learning with Minetest Part 1: Rolling out Minetest in Pre-Primary
Learning with Minetest Part 2: Activities and Aims
Learning with Minetest Part 3: Impact on the Students

As a person who is an educator and has also played Minecraft, it's been obvious to me that the idea of mixing the two concepts together would be hugely successful. A 3D world focused on building is a very suitable game-space to develop many areas of learning. The creation of MinecraftEDU, which has recently been bought and re-released by Microsoft/Mojang, seemed inevitable. The US dollar price-tag for MinecraftEDU wasn't ideal, though I have always been interested in the possibility of bringing Minecraft into my computer lab.

Last week, I stumbled across Minetest. Minetest is a free, open source game which takes it's inspiration heavily from Minecraft. Minecraft itself was first inspired by a game called Infiniminer, we are the sum of our influences, etc. Nobody involved with Minetest makes a profit, the entire game framework is designed so that anyone can create mods for the game and the community shares the development. I wrote a proposal for my school administration which outlines the differences between the two games, which is available here.

Minecraft versus Minetest

In brief, when I brought Minecraft in to test in the lab it behaved sluggishly. The IT technicians had been concerned about setting it up on LAN as they had run into issues before. Modding Minecraft was a tricky thing as it had never been designed for modding. As I mentioned, the fact that it was a paid product also put a damper on the possibility of using it for learning.

Minetest was surprisingly easily for me to set up, in comparison. Even though there is less documentation out there for Minetest (they do have a wiki), I managed to get a server running in very little time at all. The student computers have the IP address saved so that when the server is running on my teacher station they can just enter their username and press Connect. Minetest performs incredibly smoothly, especially compared to Minecraft. A few days after finding it, I still marvel when I open up a world and there's so little lag.

Day 0 - Setting Up

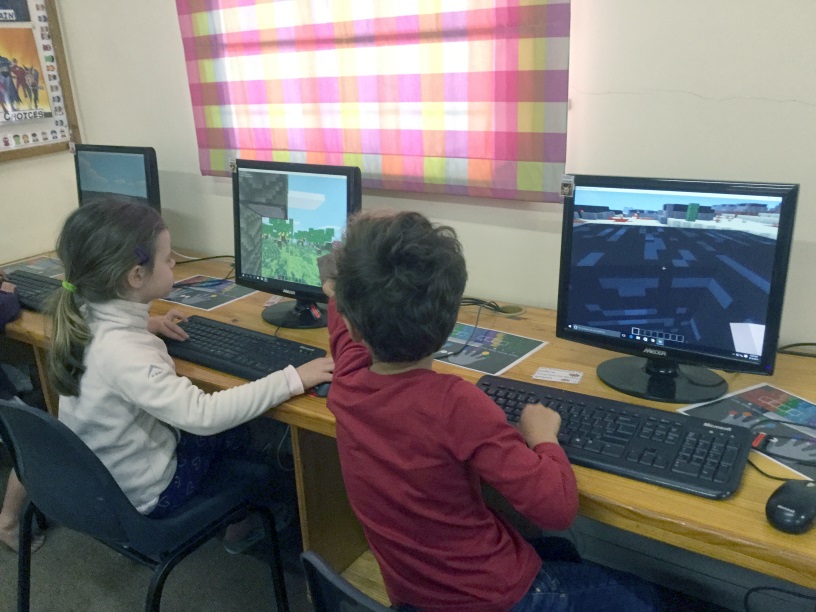
After installing Minetest on a couple of machines to test the local server idea, I invited a dozen kids in to see how the concept would work. It was an after-school hour of utter joy, for them and for me. I was soon shown how much I need to learn about how hosting a server works, but it was also immediately clear how much potential Minetest could have. Something that proved crucial was modifying the config file so that the public lobby of servers was disabled for our students. I want them to only use Minetest locally, that way it is safer, we aren't bogged down by external mods, and they will be less distracted from the learning objectives. I learned how to do that here.

Day 1 - Grade R gets a sneak peek

Today I ran my first few classes through Minetest. I had wanted more time to prepare, but one of the Grade R teachers had mentioned that I had got 'Minecraft' working in the computer lab and the first class was beside itself with excitement. I decided to dive in with explaining how the W key was used for moving forwards, the spacebar for jumping, and the mouse for looking around. Many children had never used the keyboard and mouse in this way so it was a learning curve for them. As I hadn't thought to establish a strict ruleset to enforce digital citizenship, I used the golden rule of treating each other kindly. Next time I will definitely start with a rules and consequences discussion as I have seen on many Minecraft teaching blogs out there.

Helping our friend dig out a block.
The Grade R (age 5-6) children responded really well to the experiment. All of the children were soon able to navigate around the landscape, jump over obstacles and follow their friends around the map. Some children were comfortable with beginning to dig and place blocks, which will be the foundations of the building we will do later. All of the children wanted to play again, immediately asking me if we were going to play in their next lesson. This afternoon, a parent came to find me to tell me that her son had already explained about Minetest and how much fun he had in Computers today. It's always great to hear that my ideas are helping students become enthusiastic about their learning.

Exploring our desert world.
Next on the agenda is introducing Minetest to each of my classes, beginning each one with a discussion about the rules. I'm expecting something along the following lines:
  • Use your real name to log in.
  • Leave other people's buildings alone.
  • Treat each other kindly.
I will be using the huge realm of information that has been written for using Minecraft in an educational context, many of the lessons and guides can easily be applied to the Minetest environment even though it isn't as sophisticated. I also want to get my classroom teachers in for a Minetest lesson so that they can let go of their reservations about using such a popular game for learning. If we can harness the platforms that the children are naturally drawn to for the power of good, then I think we'll have done something great.

H finds a warthog.

In the next part of this series, I will be discussing how I went about setting up Minetest for my various classes. This includes the worlds that I used and the activities that I planned. Click below to access part 2:

Wednesday, August 17, 2016

Hero Kids - Tomb of the Lost King


Midnight at the graveyard, the heroes are on the job.

This term, I have gone back to running my Hero Kids club for the Grade 2 and 3 children. I've got a rambunctious group of 6 boys, and we had our first proper session today. I'm running the Tomb of the Lost King module and so far we've had a lot of fun. I'm looking forward to this module as it throws a variety of different themed challenges at the heroes.

I went to the extra effort this time around and cut and glued the paper little minion standees - and even coloured them in! It actually made it much easier to tell the enemy mobs apart, which helped keep track of the HP values. I hope to keep this going through this module, and have already cut and glued the skeleton warriors for later on.

The more that I run RPGs for kids, the more that they impress me. Once they learned to stop fiddling with the GM models and paperwork, this group listened uncharacteristically carefully to the rules and brought forth really original solutions. I soon modeled for them how they could add creative descriptions for what happened to their dice rolls, and they delighted at giving each other ideas for the skeleton-smashing. I once saw a child's face light up when he realised that he could choose to make his character do something cool. The agency that role-playing games give players is something truly special.  

The benefits of RPGs that are easily seen are the creative thinking and problem solving skills. The kids show such utter joy that they can influence a story as it is happening. The collaboration between the players and I becomes stronger as they go on with the games. 

Here is our party line-up:
  • Ugolas the Elf Ranger - he wanted to call his character Legolas but since that's a character already he settled on a similar name
  • Max the Reptile Bladedancer - this child has already talked more in this club than he has the rest of the year... entirely worth it
  • Gluchi the Healer - only character with magic, a challenging child already shining in this club
  • Shadow the Acrobat - youngest child, first one to buy into the method of describing attacks creatively
  • Roben the Archer - the only child who has played before, running same character as last time
  • Scar the Wolf Child - first child that I've run for who has successfully used a special attack without any prompting from me

I foresee great things for this party.

Hero Kids - The Hero Kids Strike Back

Thursday, August 04, 2016

Experimental: Shared Google Slides with Grade 1s


Our Grade 1s were lucky enough to be my new guinea pigs - we created class Number Books using Google Slides! The exciting thing about this activity was that we were able to work in a collaborative environment, our Grade 1s have never done this before. Google Slides was a great first step for them into shared workspaces.

Preparation:

I set the activity up in the following way:

Before the classes happened I created a template Slides for each class, with a front cover and around 20 slides, each numbered clearly. I made all of the slideshows public, so that anyone with the link could access them. I then added the links to our grade Symbaloo so that the students were able to access it. The Symbaloo portal is a bookmark on all of their desktops and they are used to using it to navigate the web.

When the classes arrived, we first of all looked at the Google Slides UI displayed on my projector and talked about parts of it that we recognised from MS Office, such as inserting shapes and the text formatting options. They happily pointed out icons they had remembered from our previous activities. I explained that we would be creating a book together all about numbers.

A selection of pages from our number books.

The next thing that we talked about was the concept of a shared work environment. I gave each slide a number and then assigned a number to each student. Their first instruction was to go to their slide and put their name in the lower text box. We talked about how even though you could see other people working, you needed to be respectful. Assigning a slide to each student worked out really well, we had very little dabbling in other people's spaces and the students were excited but respectful.

My students were incredibly excited to see their classmates' work happening on the left of their screens while they worked in the main part. Most of them got used to the idea of shared space quickly and used this function to share ideas and compliment each other 's work.

Even though the subject material was simple, the number books turned out very well as a test run. The clear allocation of work space was perfect for this age group, just enough collaboration to get them excited but not an overload of new experiences.

The shared slides on the left with their own work in the middle of the screen showed my Gr 1s the value of shared workspaces.

Drawbacks

The primary drawback was incredibly long loading times. Despite my plan for the students to use Symbaloo to access the Slides links, I ended up pre-loading the Google Slides in open browsers on each desktop station. Even with this forethought, it took at least 15 minutes for the slideshows to be ready and loaded. This problem was not caused by the platform but by our school's limited connectivity. Once the browsers were loaded, there were one or two cases of disconnection but they were relatively rare. It was easy to get a student back into the action since it was all hosted online.

Summary

Our students were not able to use the chat or other collaboration functions that are features of the Google platform because we do not yet have individual Google accounts for our students. When this feature is rolled out, the possibilities for future projects become even more popular. I look forward to doing a similar shared slides project but

I am super proud of my Grade 1 students and what they have achieved in their first experience of Google Slides. Below is one of the completed class books.